

Introduction:
So this is my next project because it gained a lot of votes when I asked what to build next. I am a bit familiar with this mobile suit after watching the series (full of “feels”). And in my opinion, this mobile suit seems quite OP aside from the fact it uses Ein’s brain or fighting data.
Anyways, I am already expecting that this will be another smooth build same with Vual, and I was right. Well Bandai did a great job when it comes to precise size and cut of each piece that is why there were no major issues at all with this kit. That being said, I am still going to give a short review so others can still see what they can get part by part, piece by piece.
As for my typos, just ignore them as long as you get the message or idea. But if I have used any wrong terminologies about Gundams or Gunpla, please correct me.
Unboxing:

The box art for the HG IBO kits are pretty much the same in terms of design. It’s neat and the pilot’s face is shown as well.


After opening the box, I was greeted with some kind of pamphlet that I can’t even read. :v

You get two plastic bags here with 2-3 sprues inside. The good thing here in Bandai is that they make sure it is compressed (no air) so that the sprues or runners doesn’t shake inside. And this is a nice factor to look up because it can avoid scratches on the surface of the parts.


The construction manual is the same with Vual and probably with the rest of the HG IBO kits. But unlike any other construction manuals, the ones for IBO series feature a short description about mobile suit and the pilot. It’s also written in English which is nice. I saw a kit where it is only written in Japanese and I forgot what kit is it. Still, that’s a neat feature to share some info about the Gundam especially for beginners who are not familiar with the anime. So that’s for the front side of the construction manual, and the back page features the weapons of the model.

Just like your usual HG construction manual, it is folded in several pages and the back side is in black-white color. Only the front side of the manual has color.

Here’s a quick view of the sprues included in the kit which I will show below in this article.
Sprues:
|
|
|


|
|


Okay now back to the topic, you get another sheet of foil stickers and I will use the markings with the horse logo or Bauduin family logo.

I got a new Uniball Signo pen to use – the Uniball Signo Angelic Violet.
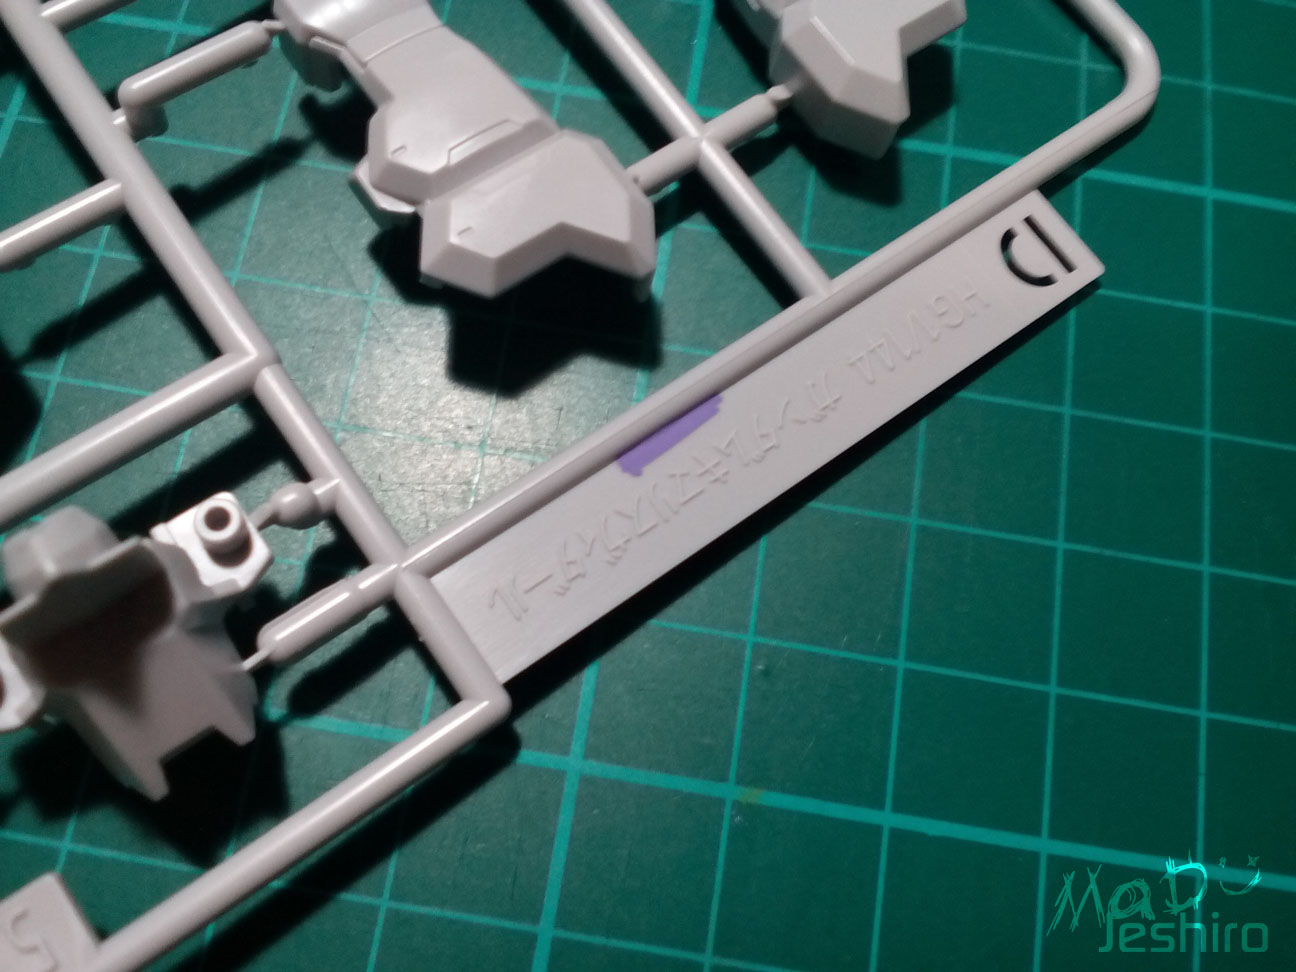

After testing it and a few votes from colleagues, I will be using this pen on most parts of the model.
Body Unit:

It features the same inner frame design with a few parts to build the outer armor of the model.


The outer armor parts were a bit tight but not much of a big deal.
Head Unit:

Good parts separation here for the head and you won’t need to use stickers for those yellow pieces on the sides. But you will still need to add some black foil sticker for the jewel or forehead piece.


No issues here and everything fit nicely. I used my angelic violet here to add some extra color. I can’t find any angelic yellow and I want that here on the head instead of the violet. Still, it matches the overall color so it’s fine on my side.

And yeah, I used the gold uniball signo pen for the eyes. If you are thinking why not use this on the head if I were looking for yellow, well I am not going to use any metallic pens on shallow panel lines. Unlike the angelic colors that don’t mess up when you touch it accidentally, the metallic ones easily stick to your finger especially if they are not fully dried up.
Arm Unit:

Okay, same like we did on Vual featuring same inner frame and you just need to place the outer armors.


There were also few tight parts in the outer armor but I still consider this as a smooth build. I didn’t use the foil stickers near the elbow because I thought it would only ruin the kit. I added some angelic violet again to add some color.

Articulation is nice but overall range of movement is limited because of the outer armor’s design. Just like the Vual, the shoulder armor is articulated and you can move it up.

This is your range of movement for the arms if you lift them sideways. It was far better than other HG kits of course because the inner frame helped a lot.
So yeah, very smooth build and nothing to worry much here (unless you want to try the foil stickers :v )
Leg Unit:

Not bad for parts separation because you get to use yellow pieces for the legs. It was a great move for Bandai to do this instead of replacing them with foil stickers. Because of this, builders now have more options if they want to paint the model.


No snap fitting issues here – another smooth build thanks to Bandai’s nice plastic quality and precise mold.

The leg is quite bulky, so the range of movement is limited. But this is compensated by the movement you can do in the ankle. There are no extra armors that would hinder their movement.
Waist Unit:

A lot of big pieces are featured here in the waist and you also have separated parts for the yellow thursters.

I noticed that even if I cut the front skirts in half, the front piece will still lock them in place. So yeah, I cut the middle portion and leaving the two ball-joints intact. Now the model can lift one front skirt depending which leg is used.

Err.. I forgot to add the polycaps in my exploded view. :v


Again, another smooth build and there were no snap fitting issues here. I love the detailing and I will put some violet on those lines.

You can lift the front skirt this high up.

You can only lift the side skirts to a certain degree because of the bulky size. No problems moving them sideways though.
Weapons:
Shield:

So these are the parts for the shield. Instead of a backpack, you get two shields with mechanical arms so you can move it to certain positions. The shields are not counted as weapons in gundam wikia, but if you use your imagination, you can do something crazy like Heero did with his Wing Zero. XD

I need to use the stickers on this one or else it would look plain. Anyways, there were no snap fitting issues here. You can see the second shield below that it is already extended, but you can’t slide them to do this. You need to remove the peg in order to adjust the shield’s tip.

The Dainslef ammunition or KEP bullets is inserted inside the nozzle. Push them in and they will lock in place.

These are the mechanical arms or sub arms connected on the shields. They have a nice articulation giving you various poses or movement range for Kimaris Vidar.

The sub-arms are connected to the shield with a ball-joint peg (A). And you can lock the shield in place by inserting the peg of the mechanical arm onto the slot just below.
Drill Lance:

Same with the Mining Hammer of Vual, the parts were straightforward. But you get a seprated yellow piece where you can insert the Dainslef ammunition (KEP bullets).
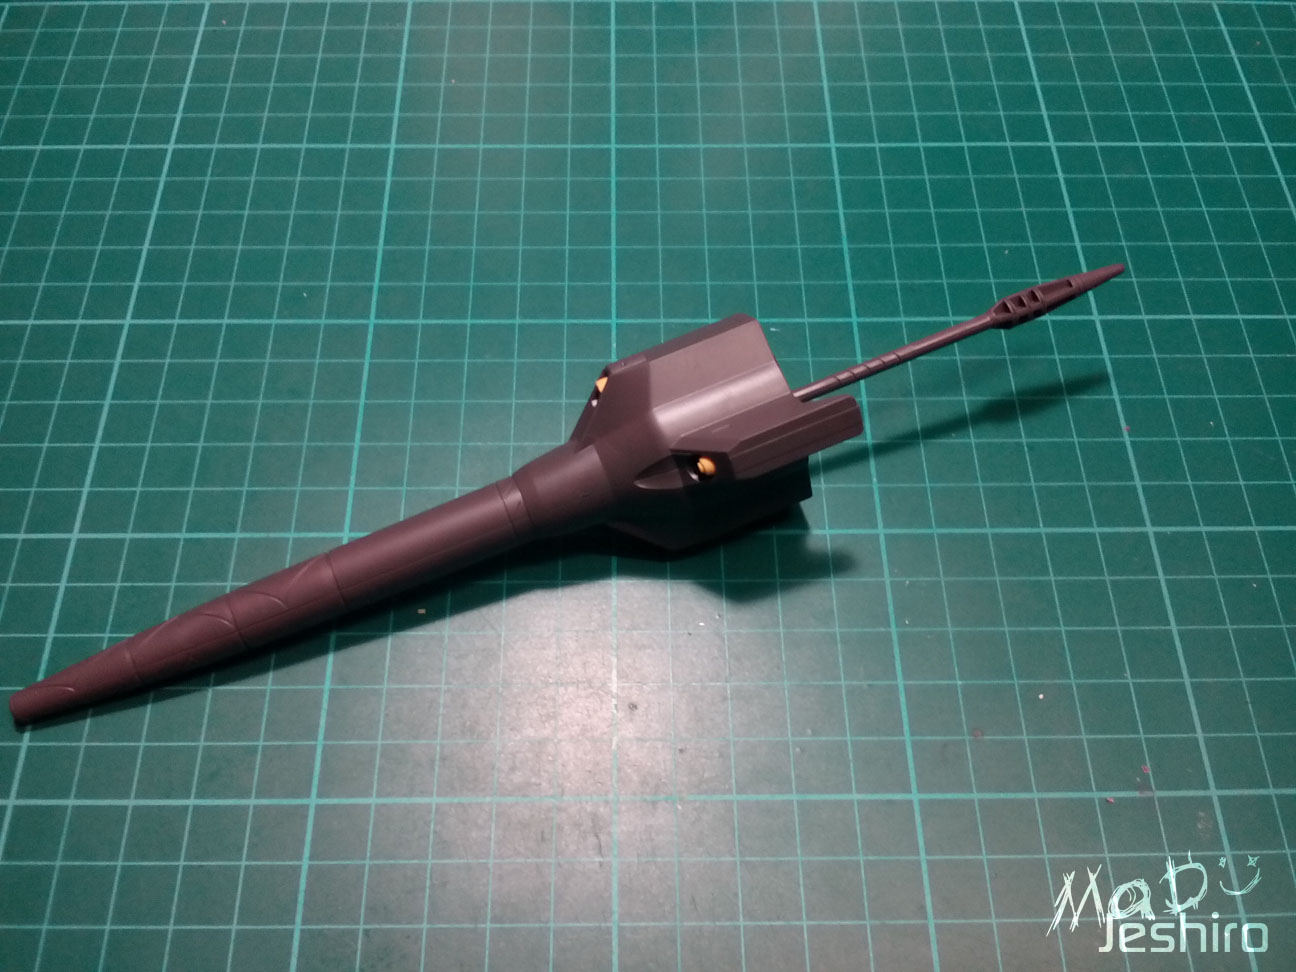
It was kind of tricky inserting the yellow part here but everything was okay. There were no snap fitting issues to deal with here.

So here’s the female peg or tube that you can use to insert the Special KEP bullets.
Sword:

The Kimaris Vidar also needs a melee weapon and that is the sword. There were no outstanding gimmicks in this weapon but it does give you a nice, sharp detailing.

Okay, aside from the sword, I saw this drill piece that you can attach on the knee guard. That’s a nice extra if you want more poses for Kimaris Vidar.
Complete Model:


Articulation Test:


Leg movement range is limited when lift it up or when you bend it sideways. The skirts are hindering its movements but not to the extent you can no longer do dynamic poses.

The arms still feature a nice angle even with the bulky shoulder armor.
Rest of the shots:


And here are my personal ratings..
 |
| Design based from GDC card |
Plastic Quality: 9/10
Same with Vual, I have no complaints for this kit. The quality is really nice and you won’t see any dimples or even flashes. It was good that the parts for the weapons don’t have that “chalky” or rough feel when you cut the nubs. I’m still not sure if that was from my x-acto knifew even though I used a new blade that time. Anyways, the rating I gave to Kimaris Vidar is supposed to be the same with Vual. But the issue from that model lowered my rating. This one doesn’t have any negative factors so I think Kimaris Vidar deserves a 9.
Assembly: 9/10
I may have some trouble with the outer armor on the body unit, but that was just a minor case. Fittings were still smooth. But you may have some problems if you are planning to “reverse build” or disassemble the model because they kind of lock in place. The pegs do fit perfectly but there seems to be some difficulty if you want to disassemble a certain part. Probably a Bandai thing I understand yet. :v
But yeah, it was smooth and I had lots of fun. I will include my comments about the foil stickers for this certain model. The front skirt and the shields have a carved portion. That means you don’t have to guess the position for the foil stickers. You just need to follow the edges. This was a cool feat and I hope they include some of them in other kits so builders (mostly beginners) won’t just scrap the foil stickers.
Detailing: 9/10
Again, we know Dragon Momoko just adds up extra points for detailing. But having PRECISE or sharp detailing always starts here with Bandai. The quality for the “semi vents” (what I call them), and the panel lines are very good. The ink stays in those lines and you won’t need to worry if they will spread once you start cleaning the surface. Edges of the parts are also “pointy” and not curvy like Daban Model or Dragon Momoko.
Bandai, it its own way can put a model to the limelight as long as the result or product is clean. Well do love Dragon Momoko for tremendous amount of detailing, but they surely can’t copy the quality of Bandai here. Some may say, that Bandai or particularly this model, have low amount of detailing. I will disagree considering the amount of parts used. You will only need very few stickers as well so I think giving it a nine same with Vual is just right. I might do the same or give the same rating to other Bandai kits next to this one.
Articulation: 8/10
The feet of the model looks odd and you might have doubts if it can even stand. But if you saw the image where I tried lifting up the Drill Lance, the legs are not to be underestimated. I already mentioned this but it was nice for the HG IBO kits to have a basic inner frame. It adds weight and stability to the model. Not only that, the range of movement is enhanced at some point. I know the other HG kits can handle most of their weights or do the same movement like that of the IBO. But there are certain factors to look up here.
Take the Leg Unit for example. Most HG kits would use a ball joint socket and connect it to a ball-jointed peg in the waist. With that, leg movement is limited, and you can’t support the weight of the upper body if you can’t position the legs correctly. While here in the HG IBO kits, using a male-female peg, you have more angles to cover. The inner frame structure on the feet is also nice because it can be rotated. Of course, that depends on the leg’s design but yeah, you can balance the model nicely with this in mind.
Gimmicks: 5/10
The kit still features gimmicks; the shield that can be extended and the Dainslef launcher. You get to move the shields because of the articulated mechanical arms (sub-arms) which is cool. Unlike Vual, you can do more things with this model.
Weapons: 7/10
Looking at the amount of weapons the model can feature, I say giving it a 7 was just fine. You have a huge drill lance, a sword and a drill that can be attached on the knee. We can also count the two shields as part of the armaments so you have a lot of weapon to use for a single model. Another good side is that you can pose the model, if using an action base, with all of these weapons.
Extras: 5/10
Having KEP bullets stored in the shield and a drill knee accessory is cool. Plus you get an extra fixed manipulator. Compared to Vual, this one has more to offer and giving it a 5 was just a fair rating.
Patience: 3/10
Knowing Bandai, they are a lot easier to build. Plus the new kits are smoother in terms of snap fitting compared to the older ones. They still have flaws but they always keep quality in check to satisfy their consumers. If you just plan on straight-building this kit, you can finish this within hours.
Overall Rating: 9/10
I love bulky or big kits and Kimaris Vidar is counted as one if you take the shields, legs, and arms into consideration. I am not sure why it needs to retain the Vidar namesake but the design definitely gives more highlight as Kimaris. I love the new look here compared to the older Kimaris Gaelio had used in the first season. Of course, the first one has its own merits and it got into the 1/100 line. This one is still in the 1/144 scale but it packs a lot of features and nice gimmicks for a HG.
I’d definitely recommend this kit for beginners so they can get a quick experience about Inner Frames and how they work. Plus, the kit is really easy and fun to build so I don’t think there would be any problems if a beginner starts with the HG IBO kits.
The model [Kimaris Vidar] features a good amount of parts which is a nice thing for those who love to paint. More parts mean more options for color schemes right? Of course there were still parts that require the foil stickers and this where the option of masking them comes in if you want a different color. :/
Because of the basic inner frame (far better than the first inner frame they released before), there are lots of options for mash-up or mixing up other outer armor with this kits. Just plan out a good theme, find the good parts, paint them, and you’re good to go. xD
So yeah, overall, Kimaris Vidar is really awesome. I hope they would release a 1/100 FM in the near future. And that’s all I will have to say for this kit. If I remember something out about this kit, I will try to add them later on. If you think I missed out something or I used a wrong info, just put a comment below.
Please do check out our gunplay related page – Click Here
No comments:
Post a Comment