

Introduction:
I did mention that I will not complete the Supernova kits
as I am running low on funds am I am into 00 series during the time I started
with Exia. I thought I won’t be able to review the rest of them but I managed
to get the opportunity from a fellow builder. He was kind of busy and he wanted
me to help him finish the model. Of course, this was free of charge. I wanted
the extra funds though but he is also on a tight budget. I tried pulling my
strings a bit so all my labor will not go to waste, but it was much of a bad
news in the end. Well, at least I get to review this kit and that’s should be
my priority; to build and experience as many model kits as I can.
Anyways, I will try to keep this short and on point. I
may however miss out a few things from issues or other gimmicks. You can
mention them in the comments section if I did miss something. You can also
mention if I have used a wrong terminology or information regarding the mobile
suit and/or model. And for my bad grammar, just ignore it.
Unboxing:

Okay, let’s start with the box. This is Supernova’s
second model, so this is the time that they are not threatened yet from Bandai.
As you can see, they still have the painted model of Sandrock. As for its size,
I think it’s the same with the common Master Grade boxes.

I don’t know which one is the rear part of the box but
this side features a silhouette-like figure of Sandrock. I think this is also a
good idea for a box art instead of putting the completed model in front.

On this side of the box, you will see the weaponries included in the kit.

The other side features a few of its action poses.

I forgot to take pictures of the plastic bags, but there
are 15 I think. The cloth for the cloak also has its own plastic bag.


The construction manual isn’t bad and you get a pretty
decent design on the front.

As for the pages, you have the common black-drawn
instructions.

Like I said, Supernova wasn’t threatened that much during
the time Bandai sued DM and Daban so they still have fancy features for their
construction manual. You can see here the other gimmicks and action poses of
the model.

Another fun thing for me is that I am glad they finally
removed that awful large sheet of foil stickers. But even with that decision, I
am still using the pens I have here for extra detailing.

You will get these clear rods and bases that will help
you make a base stand for the cloak armor.

DaLin makes its appearance once again for the waterslide
decal section. It seems Supernova can’t find a way to produce their decals yet.

We have the pedestal here.

The cloth is in a separate plastic bag with no other stuff along with it.
Runners (Sprue Frames):


We have an actual count of 29 frames here and 30 if we
will include the Shotel blades. I also included the runners for the action base
here.
As for the plastic quality, I think it was decent but not
overall great. The blue parts have this rough grainy-like look. It’s smooth but
not that glossy. You could say that it’s somewhat similar to matte (I’m not
sure if my term is correct :v). The color is fine for my taste but it still
looks dull or not as vibrant as the other kits I have experienced like DM.
Detailing is good and I like the etched and raised surfaces done on this model.
There are no imperfections like melted parts of flashes so that was a good
thing on my side.
I think 95% of the parts here got the under-gate
treatment so it will be less of a hassle when cleaning. But not all of the
parts are OK. Some parts have gates that are badly position and can risk
damaging the surface or the nearby pegs.
Some of the runners looks chewy which is similar to DM. I
like this kind of plastic because it’s easy for me to cut through the nubs.
Some of the runners also seemed “brittle” particularly the black ones. I tried
cutting the name plates of the runners and they have this rough and chalky feel.
Head Unit:


The head features decent amount of parts and it features
good detailing.


If you noticed that there’s some damage on the green part
on the forehead that is kind of my fault. The C2 part (clear) broke in half
because it was too fragile. The E1-1 part (light blue) is also tight and I got
a stress mark on this as well. You may need some extra caution here.
The E1-2 and E1-3 parts are not that loose but you might
want to put any kind of adhesive to keep them steady. These are the light blue
parts on the cheek.
Also, the main head parts F7 and F8 are quite hard to
attach together.
Another bothersome issue is the seam on the back of this
red part part. Not much of a big deal but it kind looked funny. :/
But overall, Supernova did a good job for the head of
Sandrock. Detailing looks good and I’m sure this will look even better if this
is repainted.
Body Unit:


I’d say the parts here are just average. Sandrock’s
design is simple without too much stuff added on its body. But Supernova did a
good job to add decent color separations for the model to make it less dull.


It looks really good when you finish the model. Of
course, the issues are still very visible. Main issue here would be that huge
seam on the side of the body. I have tried options while avoiding the use of
glue, but the pegs are still pushing out. Parts for the cockpit section have
tight fittings as well.
In terms of articulation, the female pegs for the arms
can be pulled outward. I’m sorry if I don’t have picture for this as well. :v

Coffee break before I continue...
Arm Unit:

The arm features average amount of parts.


The finished model of the arms looks pretty neat but I
encountered several issues you might want to take note of. Firstly would be the
black parts N5 and N6. They were quite fragile and mine broke in half as well.
Fortunately, the female peg for the bicep’s inner frame was intact so I can
retain the main articulation.
Another issue I want to point out is the gates. They were
badly placed on parts G1-7 and G1-8 making the nubs hard to remove.


Movement range here for the arms is quite nice but not to
the fullest.

The wrists however are movable which is nice for action
poses when using the Heat Shotel weapons.

You can also bend the arms backwards, but I don't think it's a good idea for an action pose. :v
Upper Body Unit (Shoulder Armor):

The shoulder armors shows off a nice amount of parts.
This is a good test bed for paintjob ideas.


Most of the parts here are under-gated so it was easy to
clean. Just a few tight fittings and you’re done.

Don’t get fooled but this simple yet elegant-looking
shoulder armor features a movable part where you can reveal the hidden slot.
This will be used for the cloak armor or the shields.

These white flaps on the sides are movable and they would
give the arm a good range for posing.

The main pegs are also movable here.

It’s time for another coffee break before the next section.
>w>
Leg Unit:

So here are the parts for the leg unit. I think the leg
features decent amount of parts considering the mobile suits in their series
have very plain-looking ones. At least here, you get to have a few parts with
light blue.


Don’t think that it’s quite easy just because they look
simple. I encountered a lot off fittings issues. Let’s begin with K9 and D2-5
parts for the knee. Pegs here are very tight so it’s really frustrating how to
attach them onto the Inner Frame. Second issue would be the I8 part because it
tends to pop off when you bend the leg. Another issue you might want to look at
is the seam on the calf armor parts. Those are the main issues and lastly would
be the tight fittings of the pegs in the Inner Frame itself.


As for articulation, you can bend the leg only this much
because it is divided into two sections.

The feet has two sections so you can bend it same with the Wing Zero Custom.

The feet has two sections so you can bend it same with the Wing Zero Custom.

The feet can be moved sideways but not that much because of
the ankle guards.
And that’s about it for the Leg Unit. There nothing much
to say since there are no gimmicks here.
Waist Unit:

I think this is also above average when it comes to
amount of parts. But I find it somewhat lacking in terms of color. Maybe they
should’ve added a few white parts?


Detailing looks great and the panel lines are really sticking
out. The issues are not that bad and all of them are just typical tight
fittings in the Inner Frame section. But you might want to take a look at the
nubs carefully. If you don’t trim them well, some parts will not fit perfectly.

Articulation-wise, the front skirts give a nice range if
you lift it up.

The side skirts however have very limited movement
because of its shape.
The back skirts don’t have any problems as well if you
lift them upward.
Overall, I think this is the only part of its body that
doesn’t have a lot of menacing problems.
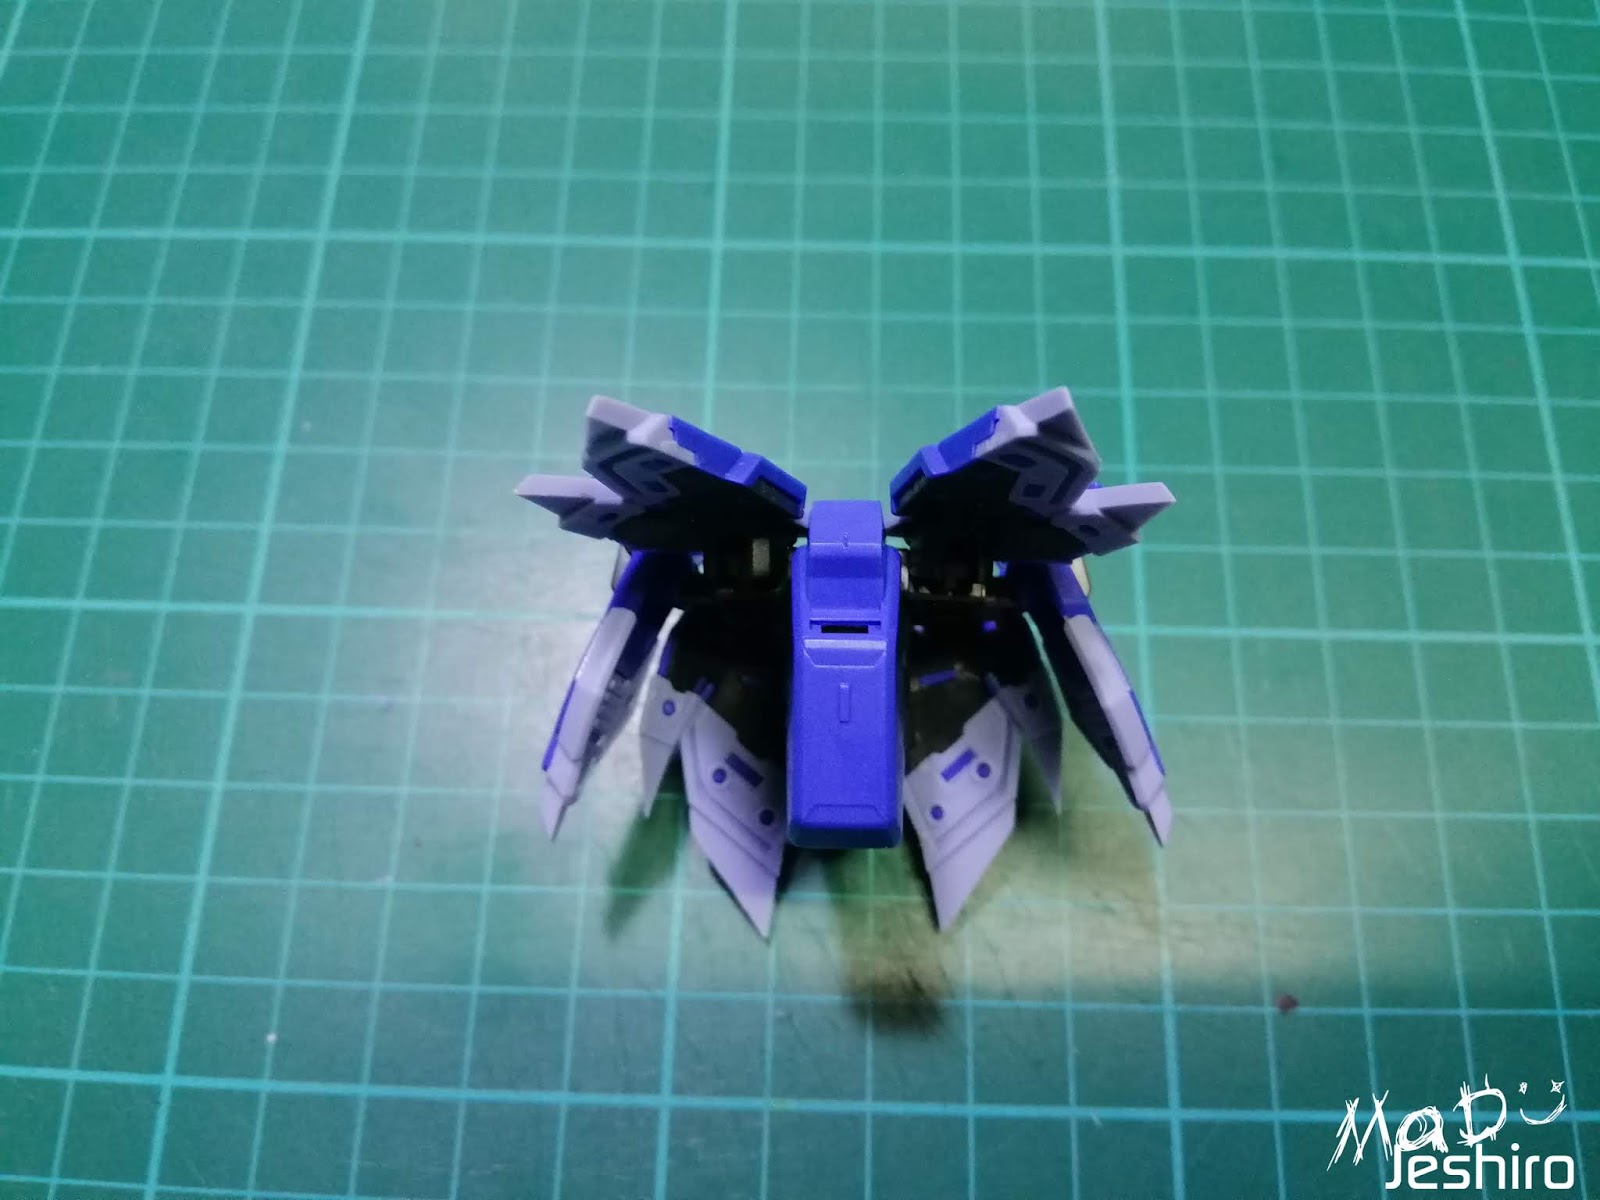
Backpack Unit:

The parts here for the backpack doesn’t feature a lot of
parts. I could say below average on this one.


Once done, you will now see the awful stress marks I had
to deal with. Even with the repeated scraping and trimming, the pegs produced a
very visible stress mark. I don’t want to trim too much or else the Shotel rack
will be loose in an early time.
The H7 and H6 parts are quite hard to attach together.
The parts with the possibility with the stress marks are I27 to E2-19, and H12
when putting it onto F9.

So here’s a little close-up look of the stress marks that
I got.

Moving on to the movement range, each rack or holster is
movable. They are interconnected with a series of round pegs allowing each
section to rotate.
Armaments:
Heat Shotel:

The parts featured here are way below average. I wish
they could’ve added more parts to add extra color.

There are no issues here but you have two options how you
want to place the blades. The first one is the usual “snap it on” kind of
method by pushing the blade rear part inside the slot. The second one is
placing the blade already before you attach the two blue parts together. Any
method is fine actually; I am just saying this in case you might figure out
that the other variant is better. You can avoid breaking some of the clamps by
putting the blade you want already.

I figured I should go with the original look of the Shotel. My client also liked this one better than the spiky variant.


The only gimmick here is the handle that can be folded on
the other side if you want to place it on the backpack’s holster.

I don’t know what it’s called but the end parts of the
handles have this peg slots allowing you to connect the two weapons.

What’s nice about what Supernova did is that they added
two more Shotels. I used the clear blue with the original design.
Shield:

Parts of the shield are features average amount of parts.


So we now have another iconic weapon of here of Sandrock.
The design is very similar with the “ver EW” one of Bandai, so credits to them.
Now for the issues, the G2-11 part is a little tight. But
that’s not even the main problem you might want to focus on. I consumed a lot
of time fixing the issues of D2-9 and D2-8 parts, as they don’t fit well with
I23 and I24. Each time I try to connect these black parts on the side of the
shield, the pegs of D2-9 and D2-8 pops out from the slot peg of G2-11. I even
cleaned the nubs smoothly but the result is still the same. I just managed to
push it really hard and just be careful while holding them.

But the feature good gimmicks to ease your painful experience. These black parts under the shield are movable using a cog-like design. This is meant for the Shotels giving them a pincer-like setting.

Another cool yet physically painful feature is the fangs.
You can pull them out and hand it loose. In the image above, the right side is
the retracted fangs and the left is pulled out.

Here’s a look at them in side view.
Beam Machine Gun:

Parts here are below average in my opinion.

But the detailing is still good. Just a couple of flashes
you might want to remove.

I don’t know what this is called but the black part on
the rear section is movable. Is this the support for the arms to reduce the recoil of the gun?
The handle is also movable in case you want to attach it
on the back of the Waist Unit.
Cloak Armor:

This is one the extra parts that allows you to add a
cloak gimmick on the model. Parts here are few but they [SN] added the yellow
parts for extra colors. The detailing here is good but some of the panel lines
are not molded perfectly, so the edges here are not that sharp.


It’s also a little plain unless you add the waterslide
decals or use some paint. Fortunately, there are no issues here in terms of
fittings.

You will also have this part that you can attach at the
side.


This will allow you to attach the shield for a more bulky
look of the model.

I don’t like the cloth given here in the kit. It’s decent
but it’s not that best and it’s not even the same with the ones on the picture.
If you have extra clothing with a rough texture, you can replace the cloth from
the kit.

Another extra stuff given here is this piece.

You also have the clear rods and the clear base for the
rod.

Combine them together and you can now hang the cloak
armor.
Extras:

I will count the display stand for the cloak armor as
part of the extra stuff here. Aside from that, you get the usual fixed
manipulators.

We also have the action base and the waterslide decals that
I will discuss later.

And let’s not forget the redesigned shotels for the
model. Maybe for some other builders/collectors, these look great. But I want
to retain the same original style I used the other variant.
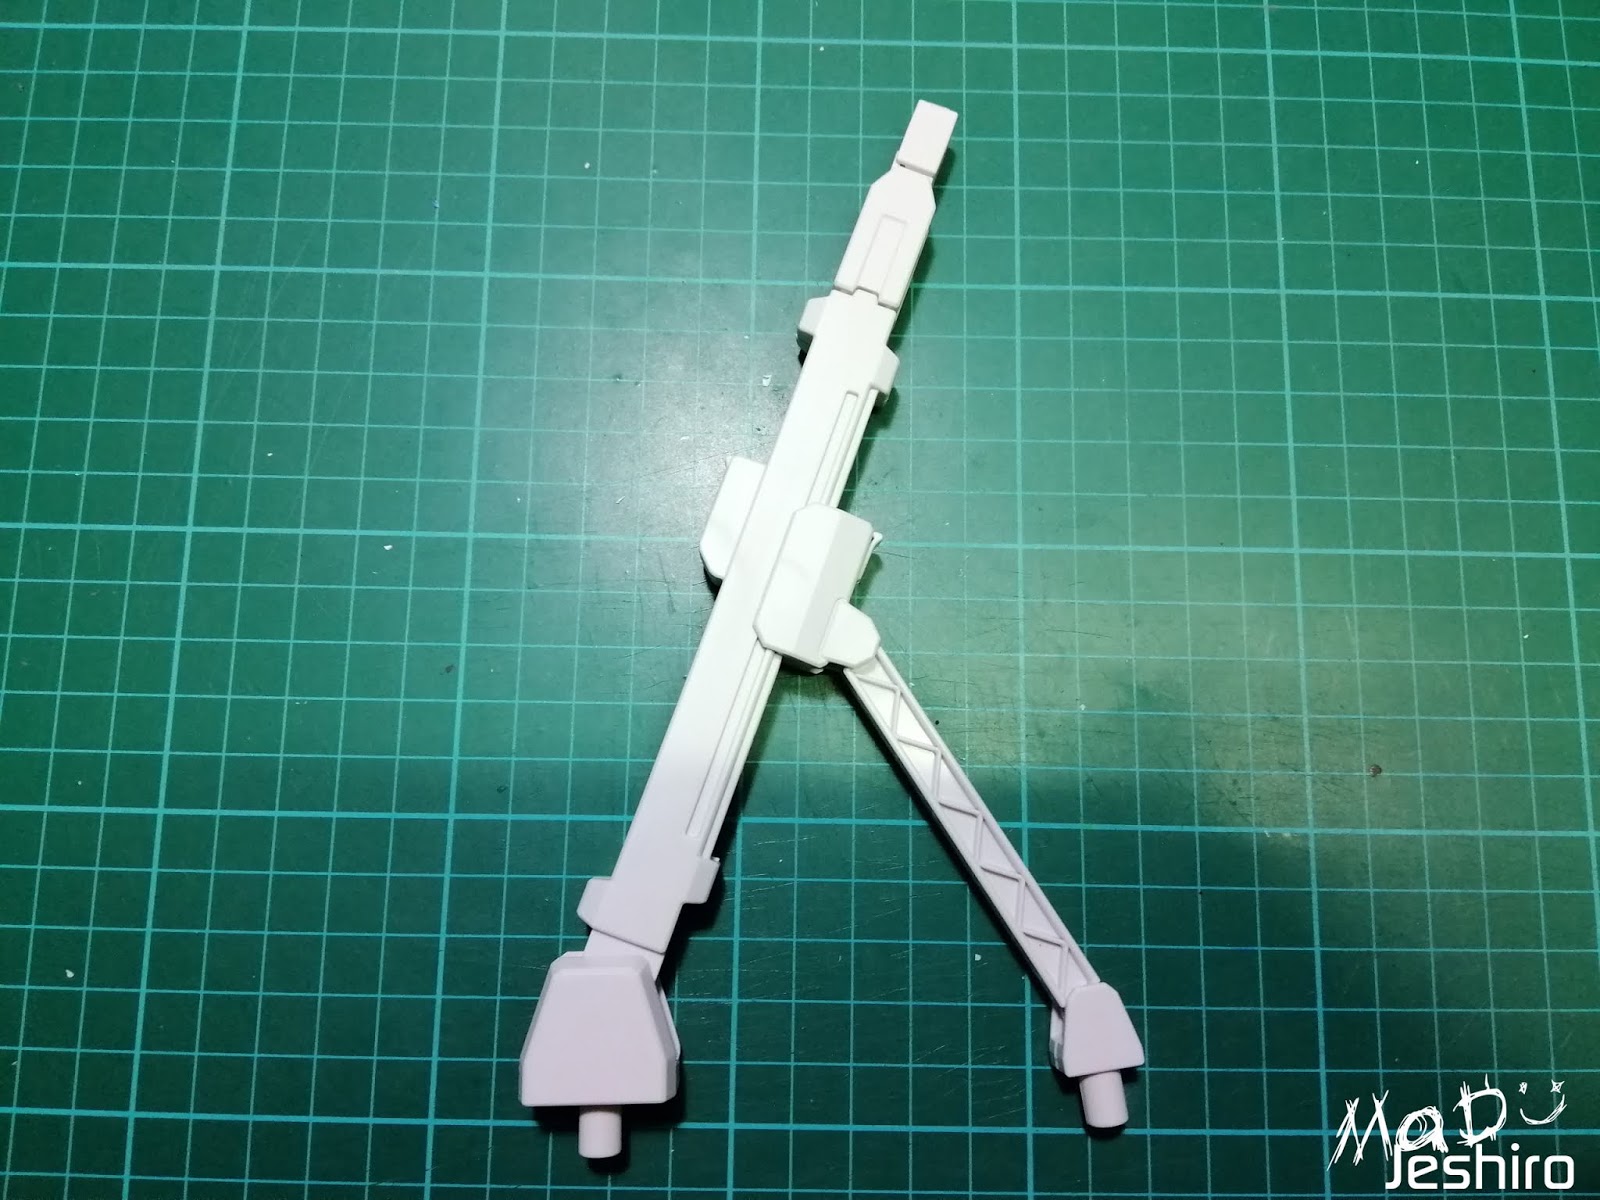
Action Base:

So these are the parts to build you action base. The
design on the pedestal is really good. But they [SN] should’ve removed that “Mo
Kai Master Grade Model” because it’s just not good. Maybe a little info or
techy detailing would be nice.

I’m not sure but the mechanism of the stand is probably
the same with the Metal Build version. You have the lock at the middle section and the front
section that acts as a support for the model’s weight.


The top part of the stand also features a lock that will
keep your model in a steady pose.

There is a noticeable difference here and it’s not much
of a big deal. Actually, I think it is more of a good idea. Looking at the
image above, the two connectors below are rounded. As far as I remember, it
should be a rectangular shape peg with a clamp-like design so it will be hard
to pull out. Now I’m saying that this is a good idea because you can remove the
stand from the pedestal easily. I find it useful because I sometimes attend to
meet-ups with friends and I need to dismantle the action bases. OwO
Waterslide Decals:
Yes, you still get the DaLin brand waterslide decals. I
don’t think I need to explain the quality of this again.

Just a quick info for this decal is that the markings get
removed from the backing paper with just a few seconds. So don’t try to leave
it on top of the water or soaking it under for a long time. You might want to
use any solutions to slightly melt the markings and set them on the surface.

Another thing I want to add is that the markings from the sheet is not enough. If you are planning to add a lot of details using decals, try to get an extra sheet or find some from your leftovers.
Completed Model:
With Cloak Armor:


Without Cloak Armor:


Size Comparison:

Close-Up Shots:


Articulation Test:


Maybe it's just the body. :/
I can't make a decent straight kneel pose.

Action Pose Shots:


If you might have noticed in the images, there are
changes in my lighting. This is because I am trying to experiment with the
settings a bit. I got a new phone and I hope that it can serve my photoshoot
for a long time.
And here are my ratings and final comments…

Plastic Quality: 8/10
I don’t mind with the plastic’s quality. I like the
texture and the shine to it. It’s not very glossy, giving the model a matte
look. For straight builders such as myself, I think adding topcoat here would
be enough. There were few flashes but not as visible as the other models I have
experienced (TTH is the only brand I know with ridiculous amount of flashes). I
think they were easy to buff out. What I don’t like is how they made the mold
for it where the gates are placed or positioned on the etched parts and near
the pegs. This added a lot of cleanup to do on my side to make sure the parts
still look good.
Assembly: 7/10
I had to drop the rating here because of the number of
tight fittings. I expected too much thinking I would experience a little better
compared to their Altron (green version) because this is already their second
model. They corrected the awful amount of foil stickers and the color is much
better than their first kit. I was hyped up that I would be nicer. I also gave
Avalanche Exia the same rating even though I really love the MS. I had to be
fair with each kit depending with the experience.
Detailing: 8/10
Well, at least they didn’t pull out any punches again in
terms of making this model really cool. The Gundams from Gundam Wing series all
look simple and they [SN] added a lot of detailing to move that original design
to a higher level. Of course, there are some fans that still prefer the
original look of the model. Of course, this would mean saving up for the
P-Bandai which is a good decision as well for a collector’s “trophy”. But if
you want something different, then Supernova’s model is your pick. Besides, you
can retain some of the features of the original look by avoiding the spiky Heat
Shotel. It’s also an option not to include the serpent-like shields to get that
design from the original.
Articulation: 7/10
So there’s another drop of points again in this section.
Movement is nice and I can still probably do a few extreme poses. But I think
it was somewhat reduced in my opinion. I wanted the model to execute a good
kneel pose. Unfortunately, it’s a little bit leaning on the side. I forgot to
test some of the action poses that will further test its articulation or range
of movement, so I might be wrong with the rating I have. With that in mind, my
apologies to all the Sandrock fans out there.
Gimmicks: 6/10
There were a lot of gimmicks in this model to make it
stand out. But somehow, I still find it few. We have gimmicks of combining the
two Heat Shotels . The shotels can be attached to the shield and give that a
pincer-like feat. I also like the extra articulated fang added in the shield
making the model look like a heavy melee mobile suit as well. I will throw in the cloak armor as part of
the gimmicks. But there are still things I wanted to see in this model. In my
case, sometimes I prefer decent gimmicks against high detailing.
Armaments: 7/10
Well, we all know that Sandrock Kai only used the Heat
Shotel when it first appeared, so there is not much weaponry to begin with
aside from the Sub Machine Gun. But, I added some points here for Supernova’s
generous decision to add two more Shotels and an extra shield. It could’ve been
cooler if Supernova added one more Sub Machine Gun and with the gimmick of
attaching it onto the shield. :P
Extras: 7/10
I will add an extra point here with the extras since they
added a lot of blades for the Heat Shotels. Plus, you also get the 4 of these
weapons. Another plus for Supernova as well, adding the Action Base and the
cloak armor.
Patience: 5/10
Even though there are some fitting issues, they are not
as many as the other models. Most of them are manageable and can be fixed
quickly, so I will give it a mid-level rating how much patience you need for
this kit.
Overall Rating: 7/10
I’m not saying that the model is straightly bad. These
ratings are just based from my experiences with the issues. I’m sure other
builders can fix this better than I did. Is it a good kit for new builders? I’d
say no. I think this is like a reincarnated example of TT Hongli, but just
better. But if you have a lot of experiences already with tight fittings,
fragile parts, or loose parts, then go grab this kit. But if you have the money
to get the better experience, go for Bandai. Bandai also features a more
anime-series detailing; simple yet beautiful.
Painting ideas? I think there’s a lot you can do here.
Parts separation is nice but there are still a lot of parts that needs masking
techniques to add more color. But if you’re planning to do a straight build, I
think it is fine. Just add some waterslide decals to make it “alive”. As for
modifications, I can’t see that much since I haven’t tried it myself. I am just
sharing my opinions about it. If I were to modify it, I would place extra
thrusters in the cloak armor’s shoulder, just under it. Maybe replace the
backpack and the weapons, particularly the Beam
I guess that’s all for my review here and I think I have
given all the factors in each section. If I gave wrong information, do correct
me. If I also missed little information about this kit, you can share them in
the comments section.