

Introduction:
I am now finally on my last batch of articles and I am starting to get frustrated what to post next. The job I have now (factory related) was fine but it is not enough to rush things off and get a bunch of kits for new reviews. The only articles left after this one is the Tactical Arms II for the Perfect Grade and the MG Universe Booster. That sums up the bad news for my blog. As for the good news, I think I will be able to get a new kit but it will roughly take me until the end of this year. That sucks because I will have to wait for another whole year just to save up some funds for new kits to review again.
Anyways, I got this kit along with Freedom 2.0 and I later bought the Universe Booster so I can have the Star Build Strike version. It was either this or the Hi-Nu “ver. Ka”. But a friend of mine teased me that Daban Model might actually make a Hi-Nu so the plan ended with the Build Strike. Even though they are just variants from the original models, I still love the designs in the series. Unfortunately due to lack of funds, I won’t be able to review MG Wing Fenice Rinascita and MG Dark Matter Exia. One of the bad news for a lot of builders is the discontinuation of the 66** model kits from Daban Model. As a reviewer, it is a bad news indeed because I haven’t reviewed a lot of kits in that line. I guess I will just have to pick for other kits to review.
Okay, I just have to think positive and welcome any opportunities available for my blog instead. As always, there’s going to be a lot of typos in this article (LOL) and please do ignore them. What I am sensitive of is the usage of correct terminologies or words related to the Gundam Universe. Please do correct me on that part. If you saw any errors, do comment them. You can also share any insights you have regarding the kit in the comment section below.
Unboxing:

It has a nice box art where the image is attacking the Zaku Amazing. One thing I noticed here as an editor are the fonts used for the Gundam Build Fighters kits. Unlike the other kits I have seen, the GBF features a smaller yet “tech” like fonts.


Now on the side of the box you get to see the front and rear view of the finished model. The Build Booster unit is also shown here with a sample of its gimmicks.


The other side features the weapons of the model along with the gimmicks. The right end of the side features the articulation of model, made possible because of the free action base.

The plastic bags are neatly arranged inside the box. The manual is placed under before the plastic bags so it will not get any damages. There are 8 plastic bags inside where the maximum amount of sprue frame/runner is 3 and the minimum is 2.


I have already mentioned this before regarding the amount of frames packed in a single plastic bag. Sometimes the surfaces of the parts have scratches because the internal male pegs hit them. If they managed to fit the plastic bags neatly, then it might be possible for them to separate the Inner Frame parts and the colored sprue frames. But one thing Bandai has done that is really impressive is to position the smooth armor parts away from the other ones. One of the plastic bags has 3 runners and the Inner Frame runner is in the middle. Only the Inner Frame parts are mildly scratched with this method. Still, it could have been better if there were 2 sprue frames facing away from each other in a single plastic bag.

The construction manual features the same box art on the front page.

The last page shows you the finished model without any markings (decals).

On the second page of the manual, the mobile suit’s basic information is featured but it is written in Japanese. Well, this is an older kit and Bandai haven’t decided to translate them into English.

The last few pages feature a little information about the series where Build Strike first appeared. The gimmicks and weaponry that were shown on the box’s sides are also here as well.


Here’s the list of the sprue frames (runners) included in the box.
Sprue Frames/Runners:


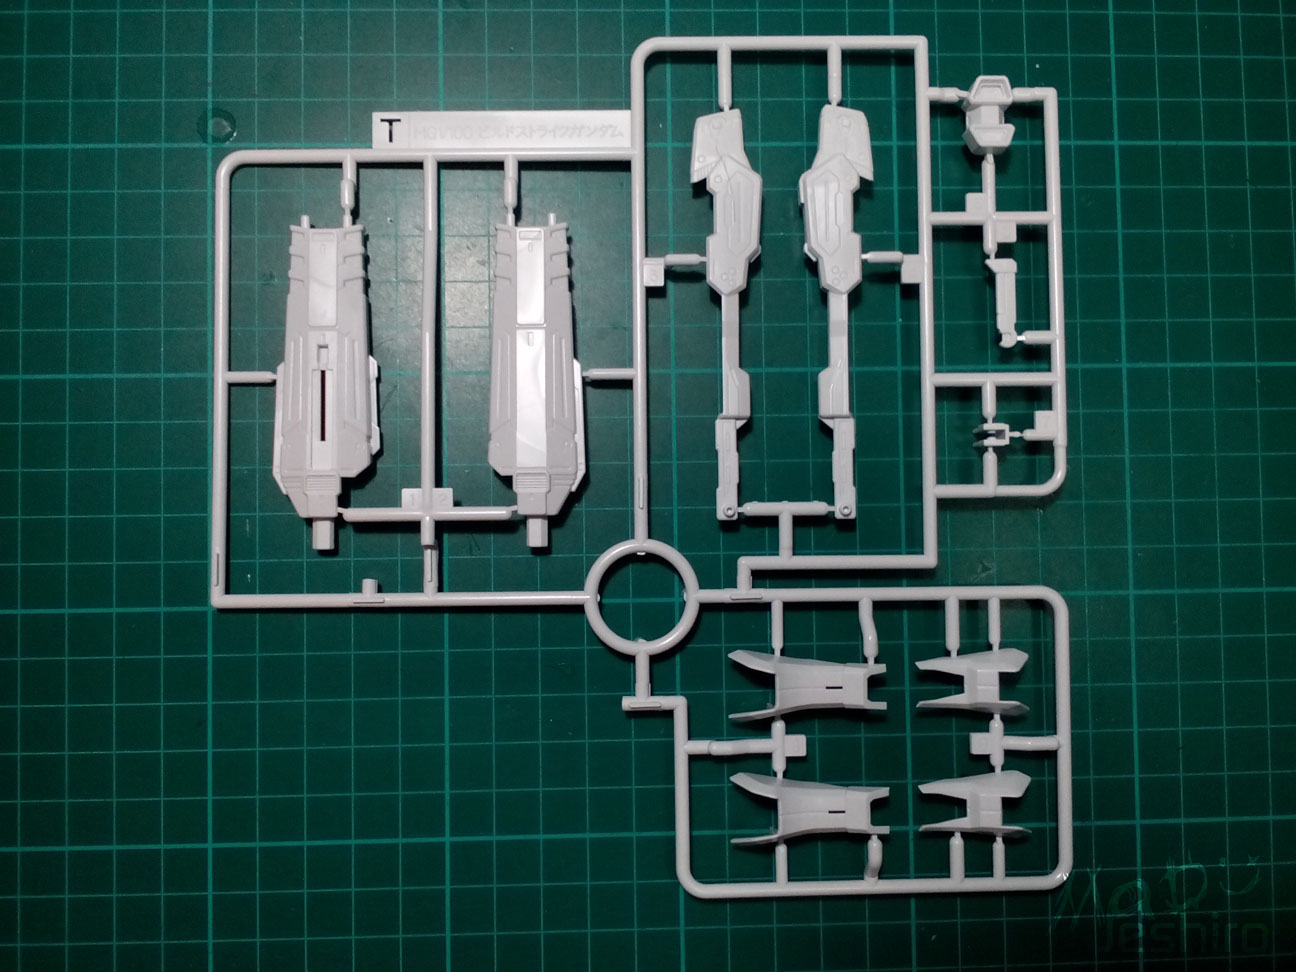


There are 23 frames in the kit and this includes the frame for the action base and the polycap parts. As for the quality, it was great even though I noticed very small traces of flashes. I like the sharpness of the detailing. And because the model is technically the Strike Gundam, most of the sprue frames here are not new. You will get new parts for the shoulder armor, the outer armor parts for the arms and the side skirts.

The usual foil and clear stickers are included in the kit. It was kind of disappointing they didn’t even add a small sheet of dry transfers because I would go for a dry transfer than a clear sticker. Anyways, there were no problems with the sprueframes or runners so that’s more important on my side.
Body Unit:

The amount of parts for the Build Strike’s body is above average.


Before I start with my usual “per unit” review, I would like to share this small info. I checked the parts and some were parts for the original Strike. But the thing that caught my eye is this part for the neck. This piece is supposed to be ash gray but it is colored in white. Though this is not the new design for the Build Stirke, I think I would go for this one.


There were no snap fitting issues here and it was a smooth build. There are no big changes here in terms of detailing and it looks pretty much the same with the original Strike Gundam. I forgot to take pictures of its articulation in the abdomen section. It can slightly tilt left or right.


The male pegs have a nice range of movement and this allows the arms to pick a few extreme poses.

You get the usual cockpit gimmick here but opening it is kind of a hassle due to its tight fitting. Not a “tight” issue you get from bootlegs. The parts were smooth that my fingers can’t pull out the hatch (LOL).


You can also tilt the thrusters on the back up and down, but only to a very small degree.
Overall it was an easy and smooth build and I had fun with it. :)
Head Unit:

Parts for the head are just average but still features decent color separation.


As for issues, the face mask doesn’t have any male-female pegs that will hold it in place. There are times it might pop off. As you can see it the side view, there’s a noticeable seem on the cheek. That’s the only problem I have encountered in the Head Unit.

I ran out of ink on some of my pens so I don’t have metallic green to use on the eye sensors. I used gold so it kind of resembled the original Strike. I still have my metallic blue so I will be using that to add some extra detailing on some of the parts. Detailing is good and there are lots of changes made here making it really different from the original Strike Gundam.
Arm Unit:

The Arm features decent amount of parts. Same with the head in terms of design, there are now a few new parts added on the forearm.


It was a smooth build and I didn’t have any problems with its fittings. The design is different because of that new look. I have added some metallic blue on some of the parts. I had to chip off the gray surface because the ink will be too bared.


The RoM (Range of Movement) of the arms is great and you can bend it with ease. Of course the result might change once the Shoulder Armor Unit is attached.
Upper Body/Shoulder Armor Unit:

You have decent amount of parts with good color separation here in the shoulder armor.


Unlike your usual strike, this has a significant change in terms of design. At some point, it kind of looked similar to Strike Noir’s shoulder armor. There are no issues here and everything fits just fine.


The gray thrusters inside the shoulder armor can be tilted outward to a small degree.
Waist Unit:

The waist unit features above average amount of parts. You still get most of the inner frame parts meant for the original Strike model.


I have no problems here in terms of snap fitting. It was a smooth build with no loose or too tight parts.


As for the RoM (Range of Movement), the front skirts give you a nice degree if you lift it up or move it sideways. The ball-jointed clamps helped a lot to extend its articulation.

It’s quite unfortunate that the back skirts are not separated so you can move a single side. But at least you can lift it up like so.
You can rotate the side skirts to a full 180 degrees, but you can’t lift it high enough like the back or front skirts.

So here’s what they looks like in top view. Of course, the body will surely gets in their way and the RoM will be decreased.
Leg Unit:

The amount of parts here are above average and you get most of them in its original Strike Gundam design.

As you can see, the ankle guards and the knee are different. There are no added gimmicks here, but the articulation makes up for it.

You can bend the legs this much without any problems.

The toe section can be tilted up or down to a small degree.

You can’t rotate the whole foot however and just features a decent range when moved sideways.
The only issue I have encountered here is this part coded F1 and this is gray in color. It’s a bit loose but not much of a big deal.
Backpack Unit:

The last backpack I have experienced with a lot of parts is the Aile Striker Pack from Dragon Momoko. The Build Booster boasts a lot of parts. Some builders prefer this because they have more options for paint schemes than just relying on masking techniques.

The Build Booster is divided into 5 sections. You have the wings, the main body, and the two beam cannons.


It looks quite huge and the main body is a bit bulky. I love the detailing though. There are lots of panel lines done here thanks to Bandai.


As I mentioned earlier, the Build Booster is divided into sections. The connector for wing to the body used a ball-joint piece that allows you to tilt the whole part of the wing. When transformed as a Backpack Unit for Build Strike, you can rotate the whole wing section with ease.


Only one of the fins is articulated and you can move it as seen in the images.


The larger wing fins aren’t fixed and you can slide it inward or outward.


Now for the cannons, they are connected with these 2-piece parts similar to a landing gear of an aircraft (idea for modding?). It gives you a very nice RoM that enables the beam cannons to have a full 360-degree rotation.

These weapons also feature handles but I got some difficulty placing the fixed manipulators here. XD

As for the transformation gimmick, you just pull or slide out the nose/cockpit section. Fold it down and you can peg it on the back of Build Strike. :)
Armaments:
Beam Gun:

Parts for the beam gun are pretty simple and you only have 4 pieces to build it.

There are no snap fitting issues here. The Beam Gun’s primary feature is that it is design to form as a handle and base. This will give you the Beam Rifle and the Enhanced Beam Rifle.
Beam Rifle:

Same with the Beam Gun, the parts here were pretty simple. It doesn’t feature any other color as well so you may want to change that if you’re bored with the common dark gray color.

Once done, you will need the Beam Gun to form the rifle. This part on top acts as a lock to hold the front section in place after attaching it to the Beam Gun.

The color looks bland and doesn’t feature any major gimmicks. But the detailing done here is great. I’m not familiar with painting but I’m sure you can make a few ideas here. :)
Enhanced Beam Rifle:

This one also features below average amount of parts. At least you get them in white so you now have the option of adding extra colors or painting them to the scheme you want.

Since I don’t have the skills (yet) to paint my kits, I stick to my usual colored pens and added some metallic blue on some of the engraved sections. I wanted to use the metallic green so I can replace the stickers, but that engraved section looks shallow and are too bared. I don’t want to touch them by accident.

It was a smooth build and I didn’t encounter any odd snap fitting issues.


As for the gimmicks, you have the usual foldable handle. You can slide the back so that the Beam Gun can be inserted on that male peg.

Of course, I prefer this one than the Beam Rifle. I will add some panel line and I’m done here.
Chobam Shield:

The shield features decent amount of parts and the separation of the colors are great. It’s nice that Bandai didn’t decide to add any foil stickers on this one.


There were no snap fitting issues and it was a good, easy build. Though I will have to find some way how to remove that red piece again once I start the add-ons from Universe Booster. The pegs fit tight and that is a good thing. The problem however is that disassembling them can be a problem. It’s quite tight that you may end up damaging the surface and/or the pegs. I added some metallic blue but I kind of forgot the front side will be covered with the add-on from Universe Booster.


As for gimmicks, these two pincer-like parts can slide out and that’s about it. You can attach the Enhanced Beam Rifle and the normal Beam Rifle on the back of the shield. The extra gimmicks will be featured in the Universe Booster article.
Beam Saber:

The parts here are the same usual 2-piece you see in some models. But the design is really neat and quite detailed.

Instead of the army style Armor Schneider, you get beam sabers.

And that is why the side skirts in the Waist Unit features a same design that of Strike Freedom and Freedom. The beam effects don’t have any issues when you pluck it in the female peg.
Extras:

You have the basic fixed manipulators in case you want to change a few action poses of the model.

There are two connectors here for the model. The first one on the left the usual connector you see in the previous GAT series MS. It is tucked under the waist unit. The second connector is attached to the action base where you can then connect it to the Build Booster Unit.
Action Base:

The action base is kind of common and you see them in some model kits like Freedom and Wing Gundam Proto Zero. It is a bit bland and there were no other designs.
At the very least, I think I should be thankful that Bandai still included an action base. I remember that there were several old Gunpla model kits that don’t have one even though they are supposed to be in mid-air or you could say known as a flight-used MS.

Anyways, as some of you are familiar with this type of action base, you can pull out the stand out of the peg placed in the pedestal. From there, you can tilt it to switch to a different angle. You only have two angles here to choose from. If you have the octagonal universal action base, that would give you more options when doing action poses for the model.
Build Booster Unit Connectors:

This idea was really good and they want to emphasize the concept of the GBF where you can mix and match certain parts from other model kits. These connectors allows you to attach the Build Booster Unit to other Master Grade Gunpla models giving you some neat ideas for certain projects like GBWC. “Kitbashing” may look as a newbie way of building but is still a stepping stone to expand your creativity when modifying something. Some builders have the skills to move on the advanced techniques so easily, but others should be happy that Bandai isn’t blind on the matter and this is one of their ways to give others a chance to experience what it means to modify or change their model’s appearance. ;)
Completed Model:
Without Backpack Unit:


Range of Movement:
First, I forgot to take some pictures on the body’s articulation by rotating the whole body while attached to the waist unit. But as far as I remember, you can do a decent 180-degree turn.

Now here in the head, there are no problems and you can fully rotate it to a full 360-degree.

I already pulled the male peg out to extend its RoM but the left arm (in image) can only reach this far. The right arm bent upwards looks fine for me.


As long as you move the side skirts up, you can raise the leg this much.

The Build Strike boasts nice articulation and I think this model can do a split. xD

I forgot to place the arm on the leg, but yes, the model can do a nice kneeling pose because of its amazing RoM. Of course, this is all thanks to Bandai. At least we get to see a mirror of the original Strike model.
With Backpack Unit:


Close-Up Shots:


Action Pose Shots:


A lot of the images were blurry and these ones are the best I could pick out of them. :/
And here's my personal rating...

Plastic Quality: 9/10
It’s not much of a surprise if we get a nice set of sprue frames/runners and they don’t have many issues to notice. Even though I have built very few kits from Bandai’s side, there are very little issues when it comes to the quality of their plastic. The frames were glossy and the colors are bright, thus making it appealing for straight builders. The molding was great because the panel lines were deep enough or very precise. Edges were also near-sharp and not as rounded compared to other brands I have experienced.
Assembly: 9/10
I don’t think I should pull down the rating just because I have minor almost-loose parts in the Head and Leg Units. Overall, I didn’t encounter any heavy fitting issues in this model. Now I am getting the urge to try out the Daban Model version to compare the issues I could find. Unfortunately, Daban already stopped producing kits from the 66** series.
Anyways, if you were to get this kit, expect a low-hassle and smooth build process. It was fun and didn’t bring up any problems. :)
Detailing: 8/10
I should be giving this a 9 since it is still a great-looking model. But I just can’t help put the fact that the model is just a remodelled version for the story. I am not against Strike or the actual model of Build Strike. I am saying that it could have been nicer if you won’t find any traces of the base kit. If the Build Booster hasn’t been attached it still look like Strike with a different shoulder unit. :/
As for the model’s other factors in detailing, I have already mentioned that the panel lines were precise. Some models from the bootleg brands have shallow panel lines, thus giving you another challenge of scribing them again. For builders like me who haven’t tried scribing, Bandai’s near-perfect mold is a huge help to have fun building even as a “straight builder”.
Articulation: 9/10
I have experienced building both the 1/100 MG (BL) and the 1/60 PG Strike; the articulation of this model is really great. As seen on the images earlier, the arms have nice range of movement. The body can tilt a bit sideways because of the separated abdomen and with the help of the ball-joint peg connecting to the waist. The legs also feature a nice range of movement giving you the ability to split or even kneel. Of course, the kneeling pose is only possible if the front skirts are well-articulated and that is a plus on this model as well because of the ball-joint and clamp connectors.
Once the Build Booster is connected, do not expect too much if there are signs of limitations in its movement. There reduction isn’t big and you can still do a lot of extreme action poses even with the backpack unit attached.
Gimmicks: 6/10
I am just giving it a 6 because of the Build Booster Unit. The Build Strike as it is doesn’t feature any fancy gimmicks aside from the retained cockpit hatch.
Armaments: 7/10
The model features a lot of weapons to use especially if you like playing with the model, doing different action poses from time to time. I also like the removal of the Armor Schneider and replacing it with the beam sabers. This is just my personal preference but I do like the Armor Schneider when used in other models. I also like the Enhanced Beam Rifle because of the nice detailing made by Bandai.
Extras: 5/10
The backpack connectors and the action base were a nice addition to the kit. As I have mentioned earlier, these connectors or pegs allows you to attach the Build Booster to other MG 1/100 models.
I remember the Master Grade Infinite Justice that doesn’t have any action base. It was a bad move knowing that the MS is used for aerial combat. And the backpack unit packs some decent weight so you really need the action base. Good thing that Bandai decided to add a simple action base here for Build Strike.
Patience: 4/10
It was an easy and smooth build, but my only enemy during the time I’m building this is time itself. I have a lot of other errands to do so I can’t build the kit for a whole day straight. But yes, it is easy and fun to build.
Overall Rating: 9/10
My overall rating is just my personal rating and I base them always on the factors above. The Build Strike Full Package was one of my favorite models because it looked awesome on the series when it got the Universe Booster. Some builders don’t like some of the models featured in GBF. The reason is that they are still the same MS and it’s not that unique just because there are a few items added. I got the same thought for Astray Sengoku and Wing Fenice, but this was before I watched the series. As a straight builder with no skills on “modding” the kits, the series helped me how hard it is to build and modify kits. A lot of patience is needed and practice to get the best model. I now appreciate the kits from the GBF and GBFT after learning these aspects in building Gunpla. I love seeing modified Gunpla models and my respect for their builders just got higher.
Anyways, as for the kits value in the market, I think it’s just right and I recommend this for beginners as a starting kit. It was easy to build so it’s also a nice kit for casual builders and collectors. Though it features a majority of the same parts from the Strike model, I’m sure you can think of nice color schemes here. If I were to paint this model, I would probably choose a Strike Rouge theme, just to get away from the usual “RWYB” colors. Well if your budget is still a problem, either save it to get the Bandai version. The Daban Model 66** kits are now stopped and Build Strike FP was one of them. Continuing on the Inner Frame, I think it is pretty much the same with the original Strike. But I am uncertain if this Inner Frame is the one used on the first Strike (Sword Launcher kit) or the “RM” version.
I can’t remember if I have other issues or positive factors to consider in this kit. I only have a couple of written notes and mostly if the body units are okay or not. I will check this article after some time once I discover something up. I hope this review helps out in some way. My next article would be Universe Booster. Again, my apologies if the articles are coming down late. I don’t have any kits to review anymore, and Build Strike plus the Universe Booster are the last two. I may pick up old photo albums where I started building Gunpla Model kits. They don’t have any exploded parts view because I am not a reviewer back then, though I keep it a habit of taking notes.