

There are a lot of things I would like to say and these are my apologies. First is that I am sorry if some of the images are blurry or out of focus. I am using a half-broken camera and it was just given to me by a close friend. I don't have the luxury to buy a new camera because my aim is just to show the features of a certain kit. I received a lot of tips from friends and colleagues how to improve my shots a little bit even with a broken camera. The results were not so bad, but I am still looking for other options to improve the lighting conditions in my room. So yeah, I apologize for my bad pictures.
My second apology would be the very late update here in my blog. I was crammed with new kits, extra work, and a lot of personal problems I have to solve. The kit I am working now (Oct 2016) is a Perfect Grade which I will post after a few more articles (I've already finished the watermarks). I am glad a lot of you are still taking a look on my blog even though there are lots of other cool reviewers than me. If I have the funds to take the kit, I will review them. And now that I have finished my contract, I have time to update my blog and post all of my other reviews. The bad news however is that I don't have extra funds now to get new kits to review. I am still hoping for my friend which happens to be my client, to continue hiring me as his builder.
And my last apology would be the often changes in my blog. If you have noticed, it's not that fixed yet and the domain shows a lot of unfixed stuff. Some of the tabs are not finished and will just redirect you to the main page again. But I have fixed it a bit by using a default template and just tweaked the fonts, color, etc.
Introduction:
After a long break, my client sent a message asking if I
would like to build his Char’s Zaku II 2.0 (TTH). Of course I will say yes because
my primary focus is to create a review about it. I got the kit and
started it right way.
After my recent failure on my client’s Destiny Gundam (I
failed to check the runners if they were complete), I carefully inspected all
plastic bags to make sure I don’t repeat the same mistake.
I would like to say that I am not much of a “mono
eye” fan. But there were some cases when I actually wanted to buy certain kits
to complete the main or primary set of the series (getting sazabi to partner it
with Nu and Sinanju for Unicorn). The idea of getting Char’s Zaku II 2.0 slipped
off my mind because I saw the brand was TTH. I thought it might be wise to get
Bandai or just wait for Daban Model to release one. Most plans are changed
because Daban Model and Dragon Momoko keep releasing new bootleg kits as part
of their competition (most of their kits are in my "wishlist").
This opportunity, getting an up-close look in the kit,
will give me some pointers if I should get one for myself so that my RX-78-2
won’t be that lonely. But I have plans on getting the Rx-78-2 3.0 so there's going to be a gap in detailing unless I do the detailing for Char's Zaku II 2.0 myself.
So this is my short review for the mentioned kit, Char’s
Zaku II 2.0, and all notes or comments I have written down are based from my
experience. I would like to point out that I didn’t copy any articles just to
update my blog.
I would like to apologize that there will be visible nub marks on the featured kit ( I haven't learned progressive sanding during this period). If there are any errors (spelling, grammar), please do mention them on the comments section. If there are also any errors on the terminologies used, please do correct me.
I would like to apologize that there will be visible nub marks on the featured kit ( I haven't learned progressive sanding during this period). If there are any errors (spelling, grammar), please do mention them on the comments section. If there are also any errors on the terminologies used, please do correct me.
(2016-10-29) UPDATE: You can click the images to show the original size and to give you a better look. I have been doing this since my first post. A lot of people probably thought the images are small. ALL IMAGES ARE LINKED TO THEIR ORIGINAL SIZE.
Unboxing:
 |
 |
 |
Well the box is the same size with those from G-Wing
series. Inside you’ll get the construction manual with the box art on the front
and the finished model is shown on the last page. You will get the usual clear
stickers which I will check if it’s good or not. There’s also a sheet of dry
transfer decal and 2 pieces of springs that will be used for the tubes on the
legs.
Runners:
|
|
|


|
|
|


|
|
|


|
|
|


|
|


So here are the runners that you will use and there are
482 pieces in total including the springs. The plastic quality is the same with
other TT Hongli kits – dull color, detailing is not that fine or sharp, and
there’s a rough or sandy texture on the plastic. At least there were no missing
parts or broken ones. I noticed a few minor scratches because they packed 4
runners in one plastic bag.
Body Unit:

Nice parts separation and structure of inner frame
credits to Bandai. The back isn’t that loose but can be removed so easily. The
PC parts holding the tubes are connected on the back. It pops off a lot but
this issue won’t be a problem once you add that red backpack unit.
 |
 |
 |
It was kind of
tiring trimming the nubs on those tubes by the way. I will add minor detailing
here later using my Uni-ball Signo pens.
Head Unit:

The head has few parts and the only thing that made it
looked so many are the tubes. You may switch the fin on its forehead because
are two designs.
 |
 |
 |
I tried the clear sticker for the eye but it gets removed
because of the clear part that is supposed to protect it. I tried coloring it
with red but the result was even worst. I decided to paint the peg instead and
the sections around the peg hoping the color pass through. The outcome was nice
and the red color of the ink did pass through. It wasn’t that clear or visible
but it was better than the clear sticker.
Arm Unit:

Good parts separation again thanks to Bandai. As you can
see, there are several different pieces. It’s because the right arm will hold
the shield and the left arm has that spiky shoulder armor. Seriously, the spiky
shoulder armor reminds me of those creature in Super Mario Bros. :v
 |
 |
 |
Anyways, regarding the fittings, there were lots of tight
parts mostly when you connect the ball jointed parts to the Polycaps. One part
of the armor that will go on the wrist is also loose and tends to pop off. My
client will not paint the kit so I applied some super glue on this section.
Fortunately, the articulation is really great and the
manipulators were also articulated. It has the same mechanism/design that of
RX-78-2. I will add some panel lining on them later.
Leg Unit:

The Zaku’s leg really boasts the parts separation in my
opinion. There are 63 pieces for each leg including the tubes and the spring.
You may think this is nice but the snap fitting was bad.
There were lots of tight parts and some of them don’t fit that much. If you
force these parts on their corresponding pegs, the result would be bad. I tried
placing a certain inner frame part for the leg and the stress marks appeared
quickly. This means you will still need to trim the female pegs a bit to fit
them in.
 |
 |
 |
The ball joint connecting the leg to the feet were a real
pain. It was hard to punch them inside the sockets. I don’t recommend trimming
the PC parts or sanding the ball joints. I fear they would become loose if you
tried sanding them. Fortunately, the plastic quality of the inner frame was
tough on this section.
The outer armor on the thighs doesn’t fit much and there
will be visible seam lines. I did some trimming on the inner frame instead.
Another issue is the PC or polycaps that you will attach on the leg. I was warned it pops off during posing. And if this happens, all those tiny tubes will scatter in your room. I don’t want this to happen so I had to apply some super glue on the thigh part (this is where the ball joint part should go).
Another issue is the PC or polycaps that you will attach on the leg. I was warned it pops off during posing. And if this happens, all those tiny tubes will scatter in your room. I don’t want this to happen so I had to apply some super glue on the thigh part (this is where the ball joint part should go).
Waist Unit:

No issues on the
parts like bad molding or warped. The waist will be using a different color.
More like magenta in my opinion. The only red color was on the backpack unit.
 |
 |
Anyways, articulation is good here but there’s a tiny issue. The side skirt armor (A12/A11) tends to pop off from the inner frame during certain poses. You can either put some glue in it or just let it like that. The back skirt’s upper part (where you will place the ball joints) doesn’t fit well. These are just minor issues for me and everything is “solid”.
 |
 |
Weapons:
Zaku Machine Gun:

Well, the weapon is very straightforward with no other
issues except for the flashes.
 |
 |
Bazooka:

Same issue with the machine gun, with some added issue -
the part J20 tends to shake a bit. I went glue warrior on this one. :v
 |
 |
Axe:

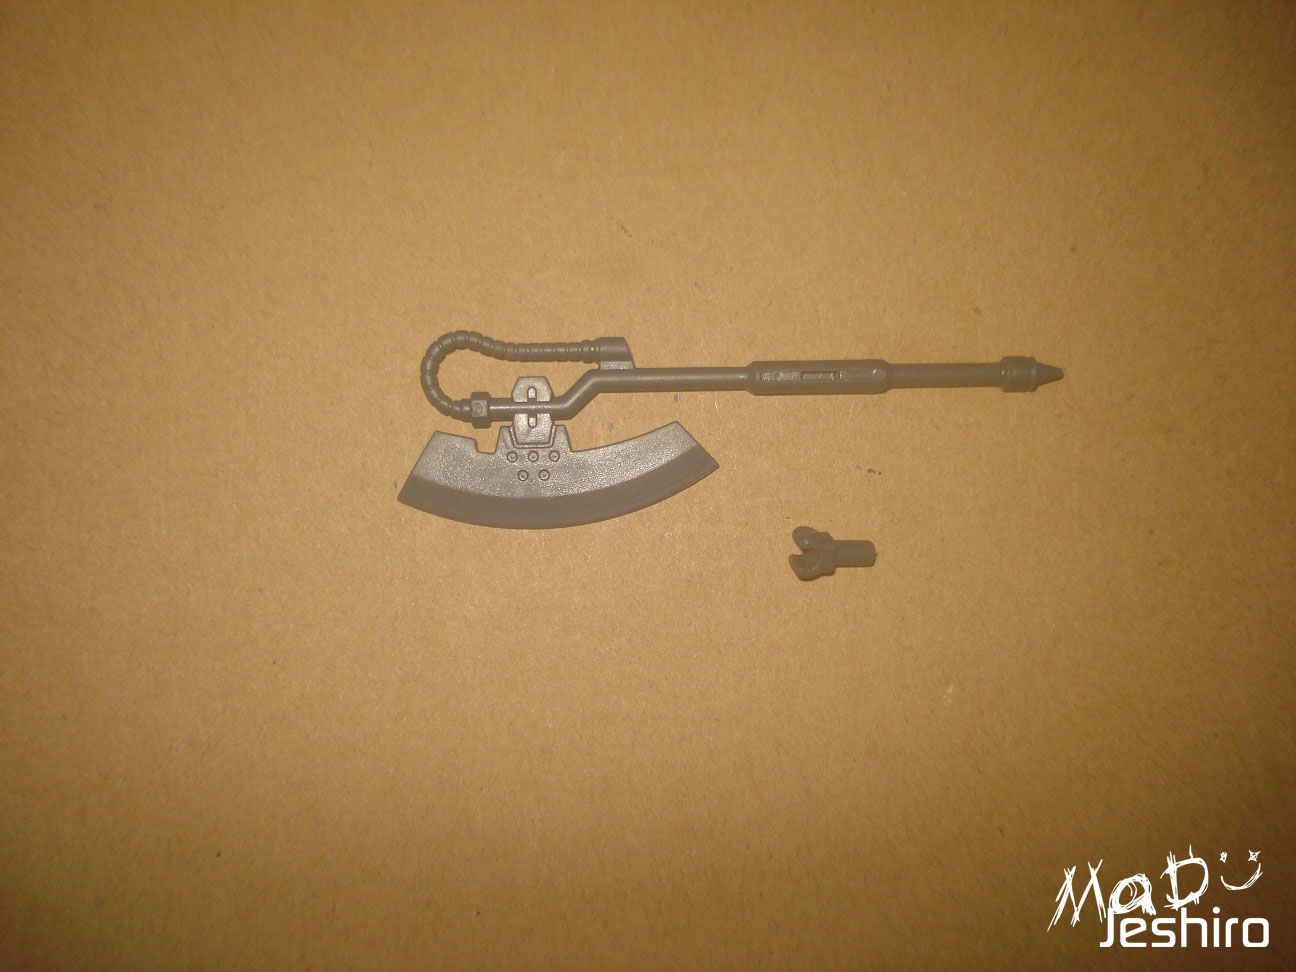
As for this melee weapon, I thought Bandai have designed
it with a separated blade. I was a bit disappointed because you just need to cut it
off from the runner. It’s not a big deal but I wanted more detailing if there
were minor parts separation here.


You get this clamp-like peg that you can use to attach it
on the side skirt.
Extra:


The lift was an extra and it’s a nice addition if you
have a chain base to use. No other issues here. :)
You can lift it up nicely and fold it down without any
problems.
 |
 |
Decals:

I used the dry transfers and they were bad. They left a visible whitish stain of sort. I’m not sure if this was the cause of old stock kits or the quality is just really bad.
Completed Model:


I did another articulation test on the completed model. As seen on the image below (click image for larger view), the range of the legs isn't so bad even though the side skirts are getting in its way. The side skirts tends to pop off if you move the leg even higher. The arms can be pulled outward because of the inner frame design in the body.

So here are my shots using the weapons the kit has. I'm sorry if I only have a few of them.
 |
 |
 |
 |
 |
 |
 |
 |
 |
 |
Again, I would like to apologize that some of the pictures have
a bad quality or blurry image. The color of the model also changed because of
the camera’s flash. I will try to find a decent lamp and a good background.
It took me some time posing it while holding the bazooka.
The design of the arm hinders a bit so the weapon’s peg gets removed from the
hands/manipulators a lot.
Anyways, I decided to create this based from GDC (Gundam Duel Company). I played the game and I really love the design/art of the cards. I thought it would be a little cool if I have an image where I can show the stats of the kit. I will continue adding them starting on this review and to all upcoming reviews. So yeah, here is my rating for the Char's Zaku II of TTH.

Plastic Quality: 7/10
I’m supposed to give a lower rating but I’m thinking it
was just my fault. If I had learned the sanding process during this time, the
nub marks probably won’t be as visible as it is on the images.
The flashes were the big trouble here because you will do
a lot of cleaning. It’s a bit of a hassle for my side.
Not to mention there's also this kind of lines on the part and breaks halfway. I think it's also a bit of trouble working on a misaligned panel line. I'm sorry I can't find the proper words to describe them and I don't have any pictures. -_-
Assembly: 6/10
Not to mention there's also this kind of lines on the part and breaks halfway. I think it's also a bit of trouble working on a misaligned panel line. I'm sorry I can't find the proper words to describe them and I don't have any pictures. -_-
Assembly: 6/10
Lots of tight parts on the inner frame section – as
expected on TT Hongli’s kits. Even the polycaps were a pain literally. Other than that, you could say that it truly IS a "solid" kit. Overall, it was fun for me having the experience to build a Zaku II 2.0. This will also give me a starting insight for other Zaku kits to come, both Bandai and bootleg.
Detailing: 6/10
Well, I had to change a lot here in my final ratings section particularly here in Detailing. I'm not afraid if the Zaku fans would rant because I gave a lower rating. What I'm afraid of is giving a comment when I actually don't know the backstory or the history about it. So I did a little research to the Zaku II 1.0 over the net. And yes, there is a huge gap in the overall change for the Zaku II 2.0. At first, I was just like, "they just look the same", probably because I didn't looked at the Zaku's design with pure enthusiasm. I'm disappointed at myself realizing that I am being biased on my perspective when it comes to kits having v-fins.
Anyways, my rating here in the detailing would be about how TTH managed the detailing when they copied it from Bandai, as well as short comment about its detailing when compared to the first version.
TTH aren't the type to sharpen the detailing on their products and they are not like Daban Model where at least trying to get closer to Bandai's standards. The semi-vents (not sure what to call them but that's what I've been calling them anyways - they are mostly oblong or circle) are not as deep as they should be. Lining them was a hassle because the pen tends to go over the area, thus giving you another task of cleaning it.
Both versions (Zaku II 1.0 and Zaku II 2.0), have nice features but I am giving this one a 6 simply because I saw that there were more nice detailing on the parts on the Zaku II 1.0. It was kind of a shame they removed them from the 2.0 and it could have been nice if they retained those gimmicks too. I even saw that there were extra weapons. Bandai however, only changed the appearance on 2.0 in terms of proportion like the size of the spiked shoulder armor. The detailing or "semi vents" on the shoulder and legs were changed. I will not state those gimmicks because I want to save my own personal comments if I get the chance to build the Zaku II 1.0
Articulation: 7/10
Because of the round/curvy design of the legs, the articulation isn’t good but it’s not that bad either.
The front and back skirts doesn’t hinder its movements especially when kneeling.
The side skirts however do pose a problem in the leg’s movements when try to lift it up sideways.
For the arms, they are not bad considering the design of
the Zaku. Its movement is greater than the legs.
Gimmicks: 5/10
Aside from your usual cockpit hatch or if you add movable shoulder armor as part of the gimmicks, I think it was just about it. As I stated on the Detailing section, the 1.0 version of Zaku II have nice gimmicks they shouldn't have removed, so I am giving it a 5 here.
Weapons: 5/10
Overall, they were really great and feature that “WW II”
aura. But seriously, they were too simple and I love the extra weapons featured on the Zaku II 1.0. I don't know why Bandai thought of removing them here in the 2.0 version. I may not be a Zaku fan but it was a bit disappointing in my side.
Extras: 5/10
Aside from your common fig, the lift was the only extra I see here. O__O
Aside from your common fig, the lift was the only extra I see here. O__O
Overall Rating: 7/10
Why the decent rating you may ask? I don’t know but I’m
starting to like the Zaku’s simplicity and this is my honest statement. Maybe
if I build more, I will start to appreciate some features I haven’t seen yet. Well the gimmicks may have been removed but looking at the model itself standing is already a trophy especially for a Zaku fan. Believe me, it wasn't easy for a non mono-eye fan or enthusiast like me to judge them.
Anyways, I think I would still suggest going for Bandai if you
will be doing a straight build. If not and you want to practice some new ideas in
painting, then TT Hongli is your shot. Although, any Zaku II 2.0 would do just fine
if you’re going to paint the mode, simply because the original color will be replaced anyway. :v
If you have really good skills in fixing the visible issues (flashes and stuff), then going for Hongli as a shortcut is a good cheap option.
If you have really good skills in fixing the visible issues (flashes and stuff), then going for Hongli as a shortcut is a good cheap option.
So that’s all for Zaku II 2.0 (Char) review and I’m pretty
sure I have missed several pointers or feats from the kit. If any of you care
to comment my errors, I will appreciate it. :)
Don’t forget to have a look on our Gunpla-related
Facebook page - Click
Here