Introduction:
I did mention before that I am not into the High Grade models because I wanted “more” which is offered in the Master Grade line. I had several thoughts if I were to accept the kit. I mean, I am more interested in building the Master Grade kits. But since I am now trying to keep the blog alive, then I will just have to put the “Gunpla Builder” spirit running even if it’s not the Grade I want. At least the kit is in 1/100 scale, so I can still apply my pens for detailing.
Well my client doesn’t have the budget to aim for the P-Bandai one and he thought this could be a nice alternative. At first look, it does look the same but you will notice the proportion and detailing when compared to its P-Bandai version. Then again, this kit has its own merits and the smooth-build experience is one of them.
So I will try to put my comments short as possible while making sure that the idea and issue of the kit are there. I would like to apologize if the articles in the blog are slow because I don’t have any other kits to review. Well, I do have 3 more backlogs but I needed some basic tools first if I want to start with any of them. Regarding my typos, just ignore them. I will try to fix them when I check up on the articles from time to time. Regarding wrong information or usage of wrong terminologies, please do correct me if you see any. I do visit gundam wikia but I may have overlooked some of the information I wrote in my articles.
Unboxing:
Back when I was younger, I thought that this kit was the same with the other HG where the box art shows the damage mobile suit from the OVA. I lack information about kits during those times. Anyways, the first thing I noticed here is the really odd scent. It’s not the plastic’s odor but it was a different scent more like a perfume. The scent was inside the kit and not outside. I am not sure if this happens on other kits from Bandai.
Even the construction manual and the sprues/runners have the same scent. Take note that the runners/sprues are sealed in plastic bags. If this issue is just an isolated case, it’s really nice. I tend to sniff at the paper every now and then. LOL
You have 4 plastic bags here that contain the sprues and I noticed that Bandai packed 1 to 2 sprues per bag.
The construction manual is in bright red with the finished model in the front and you can see the rear view of the model on the last page.
Unlike your usual High Grade kits, this one retained the same feature from that of a Master Grade. The pages are stapled so you get a book-like construction manual. It even features some scenes from Endless Waltz and some of the model’s gimmicks.
Here’s the list of the sprues written in the construction manual..
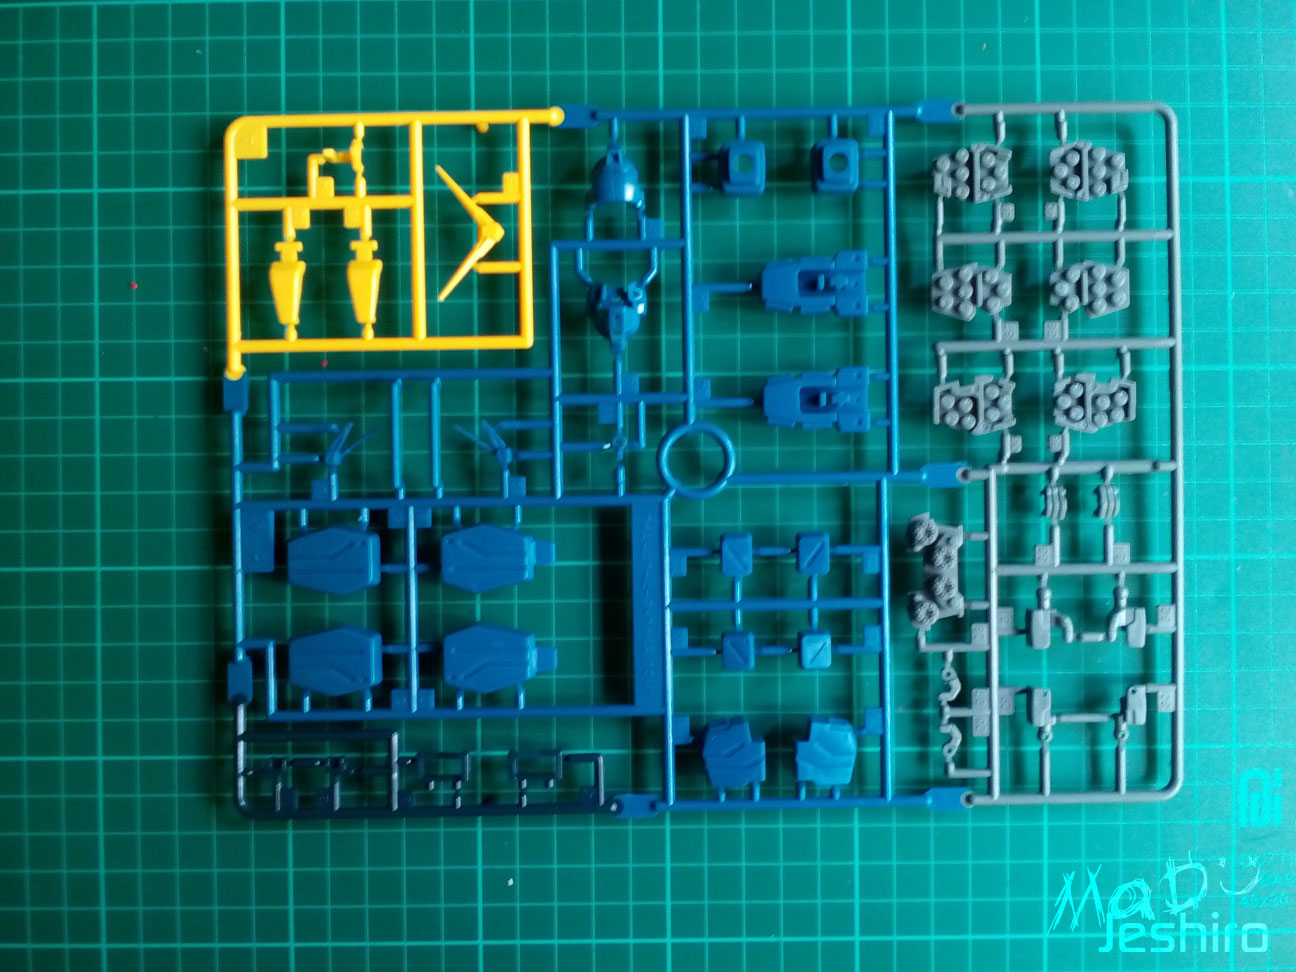
Sprues:
From Top to Bottom:
Sprue A (4 runners, x1)
Sprue B (x1)
Sprue C (x1)
Sprue D (x1)
Sprue E (x1)\
Plastic quality is nice as always and I don’t see any flashes on the edges. My only concern here is the gates because they were quite big. I will not use any sandpapers because my client will retrieve the kits as fast as possible. I will have to rely on just chipping the nubs with my x-acto knife.
Anyways, you also get a nice figure of Trowa Barton. Unlike the pilot figures you get in the Master Grade kits, this one is far bigger and you have a better view if you want to paint this. You also get the usual foil sticker sheet but I will not use any of the markings here.
Early coffee break…
Leg Unit:
Okay, so the manual lets you start first with the legs. You get a decent amount of parts here for the legs.
There were no issues here and it was a smooth build. Minor issues would be the seams that can be fixed if you were to use any seam-removal methods you may know.
I apologize for the visible nub marks if you’re irritated to see a lot of them. :v
This is just a High Grade so articulation or movement range of the model isn’t as wide as the Master Grade. Here, you have a limited angle if you try to bend the legs and you can’t even reach near 90-degrees.
But the nice thing here is that you get the usual gimmick of Heavy Arms able to flip the panels of the missile pods. As I remember in the HG 1/144 version, you can only replace the front of the missile pods with either a closed panel or an opened one.
Arm Unit:
Next are the arms as written in the manual. Again, you have a nice amount of parts because the Shoulder Armor or Upper Body Unit is included in the assembly.
It was another smooth build with no problems. Aside from the obvious nub marks (my fault :/ ), the other concern I have are the joints. I am not sure if using two polycaps to connect each section of the arm is a good idea. I am thinking that the female peg would get loose after some time. But maybe this will only happen quickly if you remove the lower section every now and then.
Articulation is good but it’s not very impressive and you don’t have a lot of range in terms of movement. Of course this is just a scaled-up High Grade so the model lacks a lot because there are no inner frames. If you try to move the arms sideways, you can only reach this degree (see image). But you have a nice bend here which is good for posing.
At least you can twist or rotate the lower section of the arm because of the two polycaps. It gives you more than 90-degrees if you want to do some dynamic poses.
The manipulators are also articulated but not the point that you can move each finger. This one features 2 movable parts and the thumb here is fixed.
Another good pointer here is the gimmick where you can open those missile pods. I will add some silver here when I’m done.
Head Unit:
The head features decent amount of parts while maintaining that easy-to-build factor as a HG kit.
It was a smooth build and all the parts fit just fine. I added some silver here and the Angelic Green pen from Uniball Signo to give it some extra colors.
It’s not visible in the front but I applied some Uniball Signo Angelic green here on the eye sensors. I will use the same pen for the body unit.
Body Unit:
The body features average amount of parts while providing the gimmicks for the chest gatling cannons, thanks to Bandai.
It was an easy and smooth build with no hidden issues. I didn’t add the foil sticker for that chest piece because I have a very shaky hand. I don’t want the sticky residue mess up the surface of that part.
As I mentioned earlier, you get the gimmicks for Heavy Arm’s chest with the Gatling guns. I will add some silver on them to add some extra color. :)
Waist Unit:
Above average amount of parts here in the waist.
I didn’t encounter any problems here and please ignore the nubs on the side skirts. >_>
Articulation is nice and gives you a decent range when moving the front, back, and side skirts.
It’s really nice that Bandai included the gimmick for the missile pods here. Unlike the 1/144 High Grade, you need to replace the side missile pods with the opened ones. But here you can slide it out to show the missiles. Unfortunately, they didn’t include the gimmick for the missile pods on the front skirts. :/
Backpack Unit:
The backpack features average amount of parts.
There weren’t any cool gimmicks here but the important thing is that there are no hidden issues, so that’s fine with me.
I added some silver on the rim of the thrusters.
You can move these two parts down and you can see that there are slots on them. This allows you to attach the Twin Gatling Guns on the back.
Weapons:
Double-Barrel Gatling Guns:
Just like in the OVA, this version of the Heavy Arms features two double-barrel Gatling Guns. It has a decent amount of parts which is good, especially for builders who loves to paint.
If you noticed, there’s a thin seam in this section and the stress mark on the right side appeared. It was really tight and I am trying to push that part on the top. I didn’t notice that the stress was already building up. Aside from this issue, the muzzle or tip of the Gatling guns were also tight and you will encounter few stress marks after attaching them. :/
Another factor to remember here are these lumps. Please do not sand or scrape them off because they help get a nice fit for the Gatling barrels to stay into place.
So those were the issues for the signature weapons of the model. If I were to feature the other weapons, those were just the Gatling cannons on the chest and the missiles pods which I already featured in their respective body units.
Extras:
Unlike the Mater Grade kits where you get a very tiny figure (which is based on the model’s scale), these kits gives you a nice well-detailed figure of the pilot. Trowa looks really awesome here. Unfortunately, I can’t paint so I will just have to send it back to the owner as it is.
Another extra featured in this kit is that you can use this one to replace the original face. It has a clown mask that appeared in the OVA. If you can paint it up, it would look really nice.
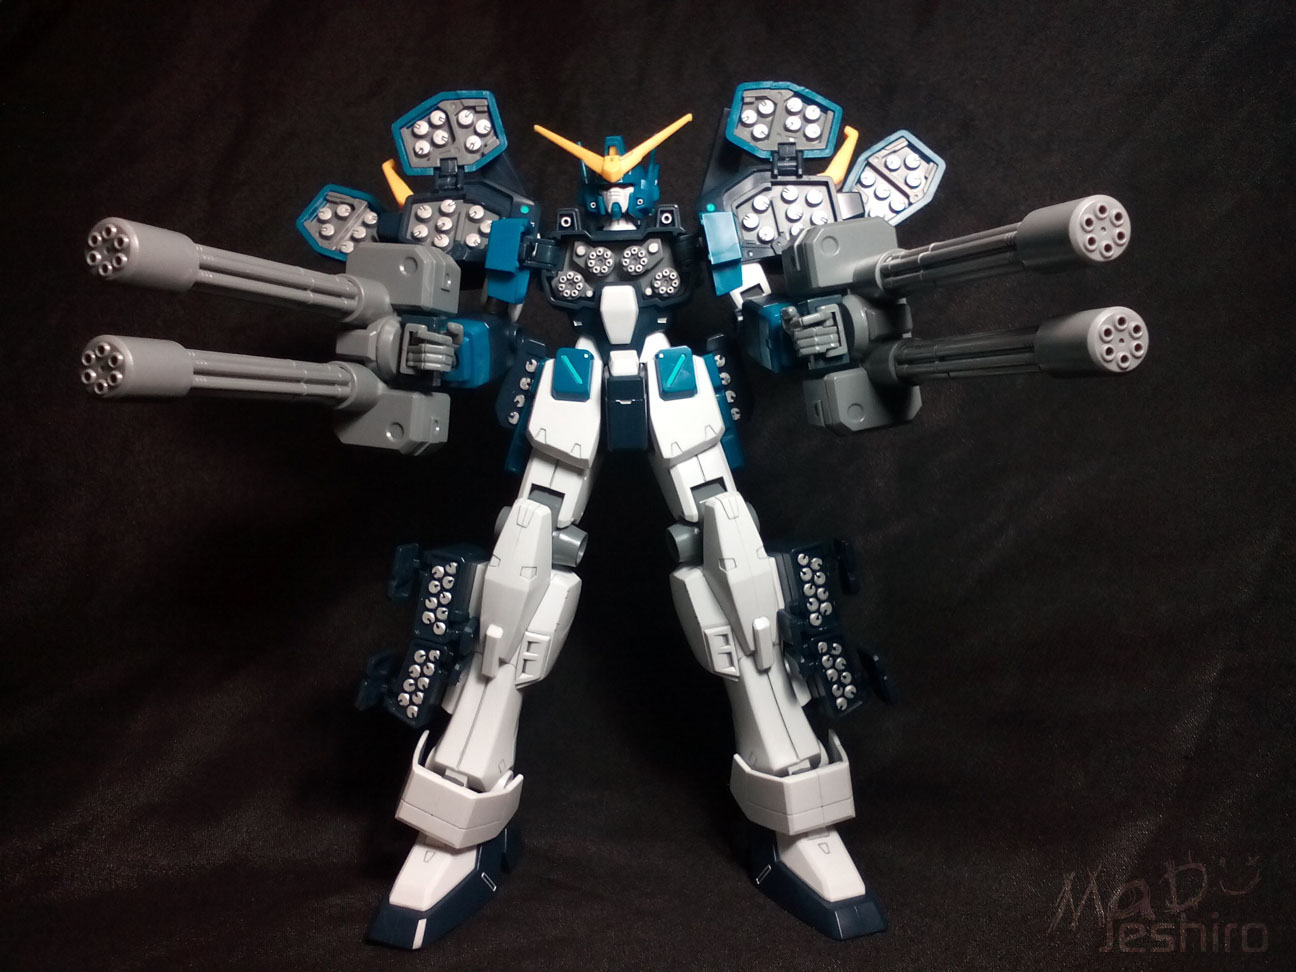
Completed Model:
Articulation Test:
Movement range is very limited because of the bulky design. Even with the help of the two polycaps in the elbow section, you can only bend the arms to a small degree.
The legs can’t be lifted high up either because of certain factors like the waist using a ball-joint connector and the front skirts are getting in the way.
Rest of the shots:
And here are my ratings…
Plastic Quality: 9/10
Aside from the very nice scent (LOL), the plastic quality is really nice. I mean the kit is really old and it was released back 1997 back Bandai managed to give their customers a guaranteed satisfaction when it comes to the quality of their products. Even if the only mentioned the date it was released but the actual kit is “new”, it doesn’t change the fact that Bandai did a great job.
There were no flashes or badly molded parts like you usually see in bootleg kits. Texture isn’t rough and it’s not too glossy. The rating I gave is just fair considering my experience with the kit.
Assembly: 9/10
The only bad shot when I built this kit were the Gatling guns. Other than that, the whole kit doesn’t have any fitting issues.
Detailing: 8/10
I must say that even for a High Grade, the detailing is great. It’s not as great as the Master Grade ones but the detailing is enough to give some “life” once you have added some panel lines and/or paint.
Articulation: 7/10
It can’t be helped it the range of movement you can do with the model is limited. The bright side however is that the articulated parts are also part of the gimmicks. Yes I am counting the missile pods in the articulation section. It was nice of Bandai for adding them up because the 1/100 has more room. As I remember, only the missile pods in the shoulders and the Gatling cannons in the chest were the main movable gimmicks in the 1/144 scale.
Still, it was a shame that this model can’t do extreme poses. The legs can’t move that much because of the ball-joint design in the waist unit.
Gimmicks: 6/10
Like I said in the articulation section, the missile pods that feature movable hatches or covers were the highlights here in the Gimmicks Section. Most of these covers have hinges that allows you to open and close them with ease. I said “most” because the front skirts have missile pods as well. But in this kit, it is fixed or closed. I haven’t checked the P-Bandai and compare their features.
The model doesn’t feature any other gimmicks but it was more than enough for a High Grade kit in 1/100 scale.
Weapons: 7/10
The main weapons of Heavy Arms are the Dual or Twin Gatling Guns. The other weapons are the huge amount of missiles hidden in the model’s body. You also have 4 gatling cannons or gatling guns in its chest. Overall, Heavy Arms ver EW looks simple on the outside but the model really packs a lot of weaponry. The gimmicks applied here in the 1/100 scale helped a lot to feature its weaponry. Even though you can open the missile pods on the front skirts, all major missile pods including the chest weaponry have articulated hatches or cover to open them up.
Extras: 5/10
The only extras you have here are the extra white part for the face with the clown mask and the up-scaled figure of Trowa Barton. Other than that, you get nothing else from the kit.
Patience: 4/10
I don’t think that this kit will consume a lot of time aside from the issue in the gatling guns that you will need to fix just to avoid the stress marks.
Overall Rating: 8/10
Plain and simple with gimmicks in a 1/100 scale; this High Grade kit gives you a lot compared to the 1/144 series. There were no big issues aside from the Gatling Guns so I think the rating I gave for this kit is just fine.
If you’re having a really hard time saving up for the P-Bandai, then this kit is a nice shortcut. It’s also a cheap kit that offers a lot of room if you want to practice painting, adding mods, adding more panel lines, etc. You may want to practice “seam removal” methods as well in most of the parts. These are just very thin seams or gaps, but it’s the perfect base to practice removal of seam lines. Of course, the P-Bandai Heavy Arms have a cooler overall design and proportion compare to this one so you still have a choice to make. If you just want to collect the whole Endless Waltz line, then this is your shortcut without spending too much.
It’s really easy to build and this is a good starting line for beginners who want to step up in their scale before trying out any easy Master Grades. Like I said, this kit (as I recall) is quite cheap. If there was a bootleg of this kit, I’d still recommend getting the Bandai one. But if Daban Model managed to get the P-Bandai Heavy Arms, then that’s a different story. That’s all I have to say for this kit and I will try to check out other information I might have some other time (Lazy Mode activated :P).