

Introduction:
After finishing the Astray Blue Frame Second L, my client
sent two more kits; Daban Model Unicorn Banshee and the PG Wing Gundam Zero
Custom of TTH. I said yes without hesitation and I started with the WZC first. And if you noticed, I posted those two kits (ABF and WZC) some months ago. Well I had a lot of stuff to do and Dragon Momoko's PG Unicorn was a priority to be posted as quickly as possible even though I have finished reviewing this kit. Now I finally get to review the Unicorn Banshee or called as “Dabanshee” by
many. I had a lot of bad experiences with the two Unicorns from TT Hongli, so I
am looking forward here in Daban Model. Some of them said there were several
issues in this kit and some said it was more like a “closer” step to Bandai.
I haven’t put into thought of getting one for myself as I
have a lot of kits to get in my wishlist before the end of 2016. I managed to get
3 of them (Freedom 2.0, Build Strike and the Universe Booster) which I will
share here in my blog. I want to get a few Iron Blooded Orphan 1/100 FM kits for 2017 IF POSSIBLE. Probably the Barbatos First Form, the Barbatos Lupus, and the Gusion Rebake.
Please keep note that I am not a professional builder. I
am doing this because it makes me happy. Yes I love what I do even though I
have a lot of mistakes. I would like to apologize that there will be visible
nub marks on the featured kit. If there are any errors (spelling, grammar),
please do mention them on the comments section. If there are also any errors on
the terminologies used, please do correct me.
Unboxing:


When I carried both the PG WZC and this kit in one
plastic bag, I didn’t know how heavy each of the kit was. When I tried lifting
the box of Dabanshee up, it has some weight and that’s because there was
another brown box inside it. The front of the box is your usual box art and you
get to see the Unicorn Banshee in the rear. It features the completed model in Destroy
and Unicorn modes. And yeah, sorry for the blurry images. My hands were shaking and I'm using my old broken camera during this time.

After opening it, I checked the runners quickly and saw
several pieces already removed probably from shipping or during the time the
runners were being packed. One of the parts (psyco frame parts) had a broken portion.
Fortunately, it won’t be an issue when I reviewed the manual where it’s
supposed to go.
I also saw that the parts have thinner gates connecting
them which is good news to me. Or maybe I was just been working too much at the PG WZC for a
long time to have such a thought.

The manual shows several parts crossed out because of the
Armed Armor VN and Armed Armor BS weapons. But I will feature the normal arms
here for the articulation segment.
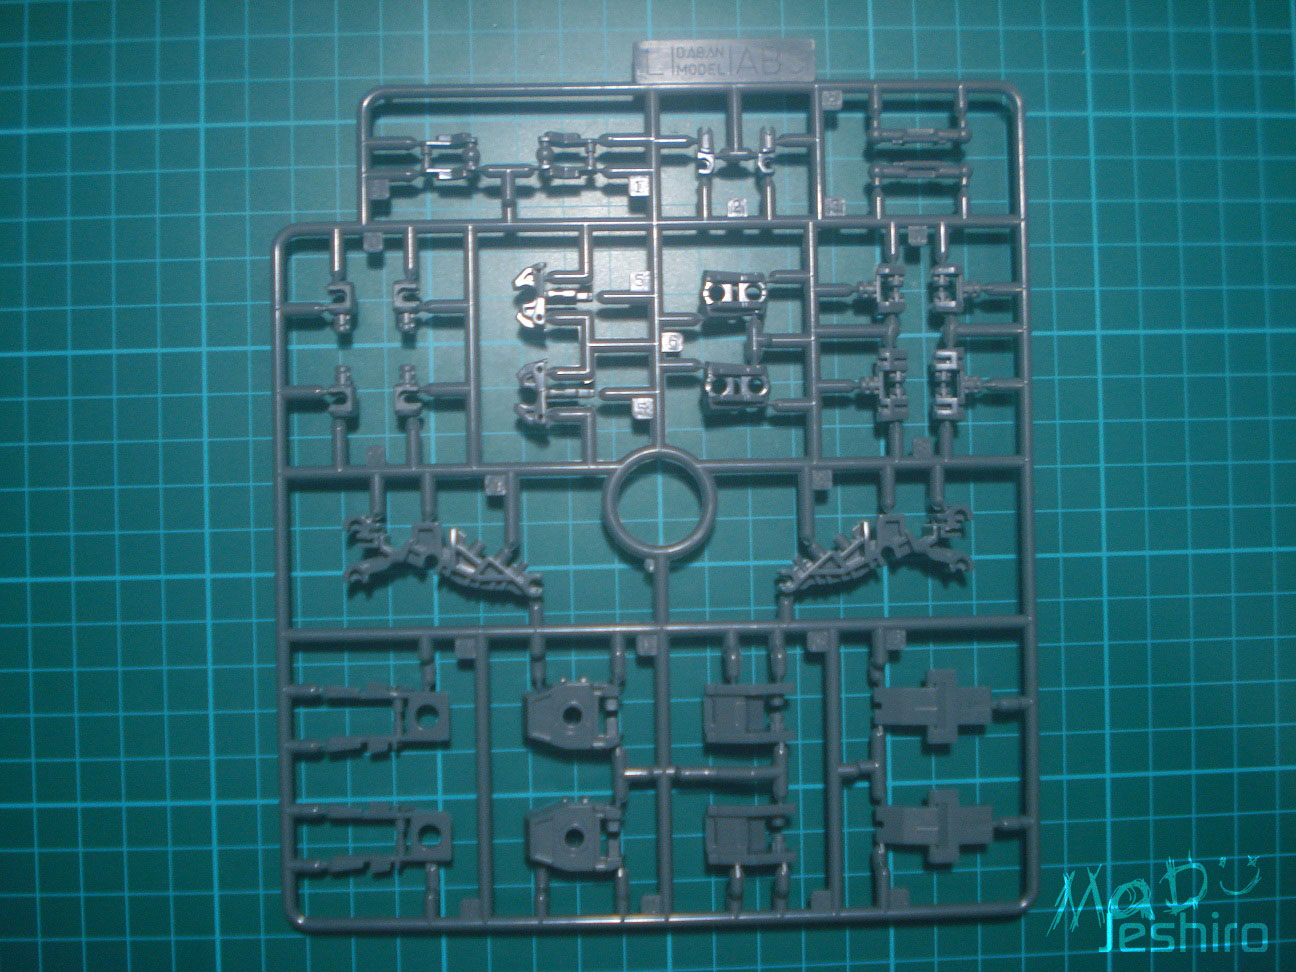
So there are 21 Sprues here and the first thing I’ve
noticed is the runners for the leg’s inner frame. It will be using the same
clear orange parts like the psyco frame. I’m trying to imagine what if the Unicorn
would look like having several clear red inner frame parts. I don’t know what the
reason is but it could’ve been cool if they made that way.
So the next images will be the runners and contents of
the kit.
Sprues:
|
|
|


|
|
|


|
|
|


|
|
|


|
|
|


|
|
|


|

One of the sprues, the Sprue SB1, is tangled in one of
the other runners inside the plastic bag. If you noticed, these are the beam
saber effects and the other beam effect has now a curvy design. What’s worse is
that it can no longer be returned to its straight form.
As I said earlier, some of the orange clear parts were
removed from the runners, probably during shipping from the factory.

You will receive the common set of clear stickers, foil
stickers, and the dry transfer decals. I won’t be using any of the clear and
foil stickers for this kit.
Body Unit:

So here are your parts for the body unit. I still
remember a few of these parts when I built the Unicorn Gundam of TTH. Here, you get
another extra yellow piece for the chest.
 |
 |
 |
I am quite amazed that there were no major issues here in
the body unit. Everything fits nicely and there were no flashes on the parts.


You can pull out the peg to a small degree that gives you an extra range in
the arm’s movement.


As for Destroy Mode, a few tight parts will greet you but
everything is okay. I had no problem switching it back to Unicorn Mode. Snap
fitting is great because the parts stay as it is and doesn't pop off during
transformation.
Head Unit:

I still remember the frustrating transformation here in
the head during the time I was building the FAU. But here in Daban’s Unicorn
Banshee, it felt like a little closer to Bandai. There were no snap fitting
issues.
The two tips of the V-fin however is slightly separated from each other. But you can use the other fin if you just want the Unicorn Mode.
 |
 |
 |
The two tips of the V-fin however is slightly separated from each other. But you can use the other fin if you just want the Unicorn Mode.
 |
 |
 |
When you transform it to Destroy mode, the H3 part will be the
one that will slide most of the head parts. It’s a bit tight but if you can
glue the BA-22 to this H3 part, then you won’t be having troubles during
transformation. It tends to pop off [BA-22] when you try to slide it back and
forth. Anyways, it wasn’t a big deal so transformation can be said as “smooth”.
I almost forgot to mention that I used the uniball signo
metallic red. It’s not that visible though but it was a better choice than
using the crappy foil stickers for the eye sensors.
A little coffee break while cleaning the pieces for the arm...

Arm Unit:
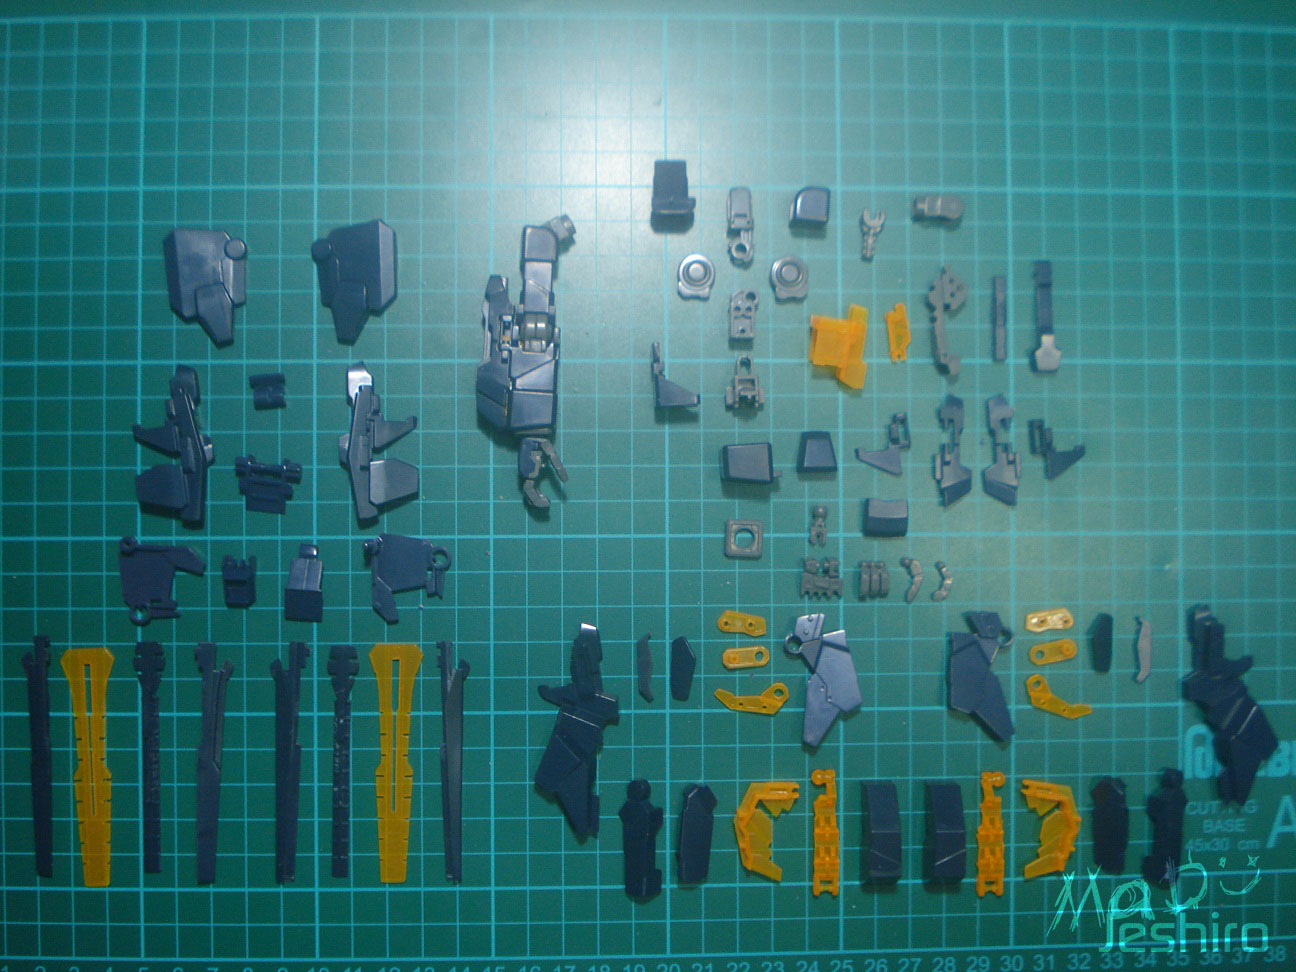
If some of you have noticed, I am now building 1 part
ready for the arms and legs. This is to reduce the time I need when cleaning
the nubs. Of course I will fully clean the first part, and then move the arm or
leg to see if there are parts that doesn’t need to be sanded. It was better
than laying all the parts on the table and I also get to reduce the space
consumption when taking pictures as well.

Anyways, so that’s all your parts for the arms and I have
included the parts crossed-out in the manual (E4+E2/E3+E1). These parts [E4+E2
and E3+E1] are already attached on the Armed Armor BS and Armed Armor VN.


Here are the finished arms and I used the crossed out
parts to make it look like the usual Unicorn Arm. I will attach the weapons
later. As for articulation or range of movement, the design is hindering the
arms to be bent even further.


The range of movement It can do in Destroy Mode didn’t changed much. Although you can lift those fin-like parts, the E1 and E2 parts, to show more of the psyco frame inside.
Shoulder Armor/Upper Body Unit:

The amount of parts here is above average considering it
needs a few parts for the psyco frame and transformation gimmick.


It was a bit plain so I added a gold line using my
uniball signo pen. I may have sanded too much of surface so it now has a
rounded or curvy edge. To compensate for this change, I also sanded the parts
with no nubs just to get the same design.

There are no snap fitting issues here. And the
transformation doesn’t surprise you with any parts that will pop off. :)
Waist Unit:

So here are your parts for the waist unit. Instead of
using the grey inner frame for the back and side skirts, this kit replaced them
with the clear orange parts. I was a bit disappointed why Bandai didn’t make
this kind of design having more psyco frame parts to replace the gray ones.
 |
 |
 |
So here’s the finished product of the waist and I would like
to apologize about the lighting. The range of movement has 2 sets of
hindrances.


First, is that you can fully lift up the side skirts if the back skirt isn’t lifted. Second, now if you lift the back skirts all the way up, the side skirts are now having the problems of getting the good range.


First, is that you can fully lift up the side skirts if the back skirt isn’t lifted. Second, now if you lift the back skirts all the way up, the side skirts are now having the problems of getting the good range.


When you transform it to Destroy Mode, the articulation
is just the same as the Unicorn Mode. Good thing that there are no issues during transformation.
Leg Unit:

Sorry I don’t have the finished leg near the exploded
parts view. Anyways, these are the parts for your leg. This one here is for the
left side.

I trimmed this L11 part a bit because it was really hard
pushing it on the clamp. This part will move a bit each time you transform the
feet to Destroy Mode. You don’t need to do the same thing as long as you can snap
it on the part carefully. I just had several issues back on my TT Hongli
unicorn so I had to do this.There were no side effects on the transformation gimmick after the trimming.


Anyways, here are finished legs and I separated the two –
one in Destroy Mode and one in its Unicorn Mode. You will notice as a start that
the height is changed dramatically once transformed into Destroy mode.


Movement range isn’t that good for both modes and you can
see that they can’t even reach the 90-degree angle.
But on the bright side, there are no snap fitting issues.
As long as you place the parts correctly, there won’t be any broken pegs here.
Transformation from Destroy to Unicorn or vice versa was also smooth and I
didn’t encounter any issues. It was really great. :)
I'm almost done :)

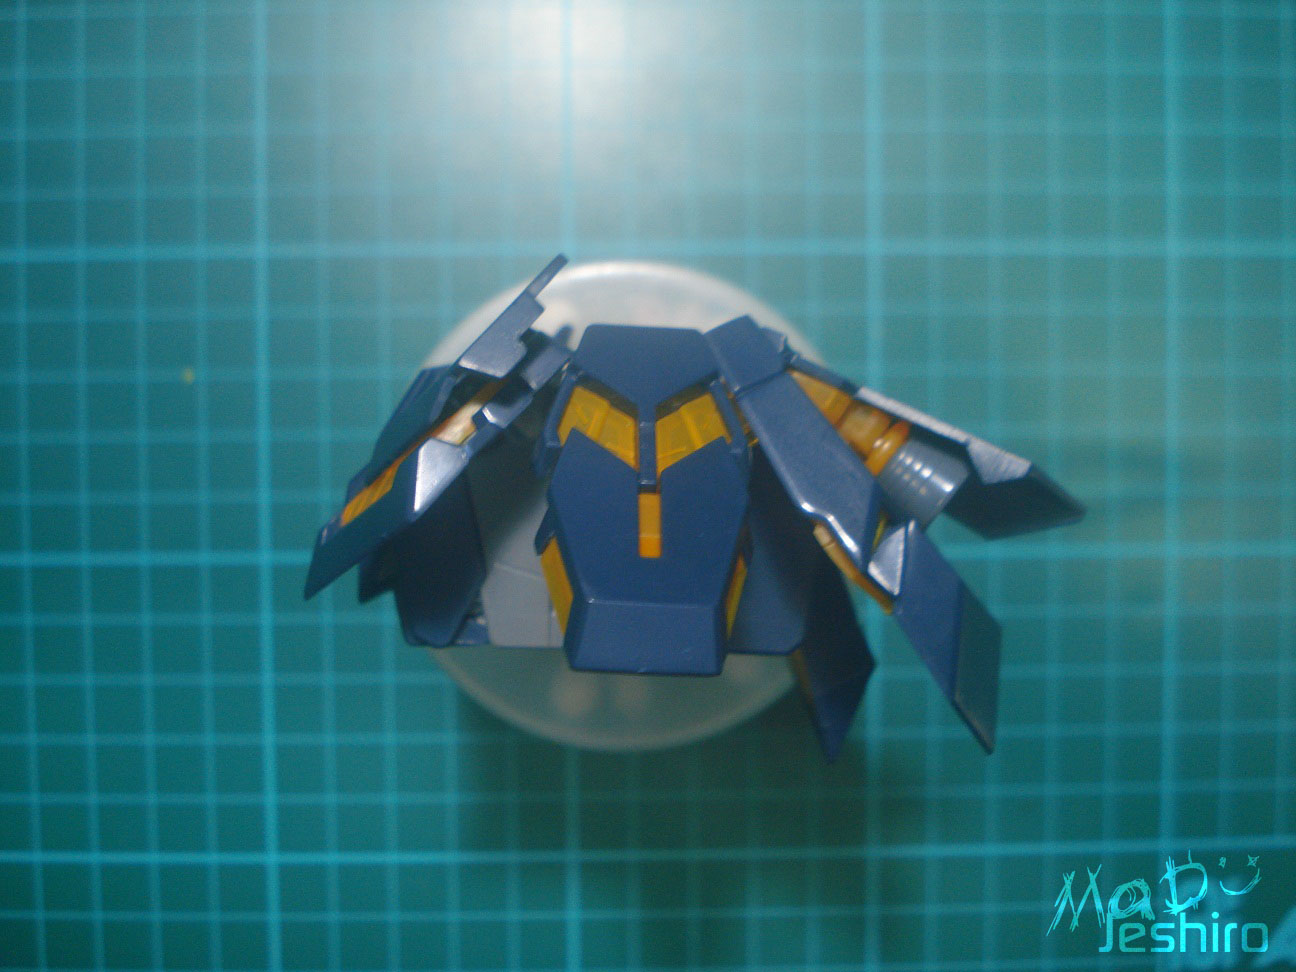
Backpack Unit:

There weren’t many parts here for the backpack, but the
color combination of the black and orange from the psyco frame makes up for it.
 |
 |
 |
There are no snap fitting issues here and all parts fits
just fine. The psyco frame parts were really sturdy that the ball-joint peg
didn’t show any stress marks when I punched the thrusters. The backpack unit
looks really simple in its Unicorn Mode look.


Once you put it in Destroy Mode, the psyco frame part inside will be revealed. Two more thrusters can be pulled outward from the sides and a small part on top can be pulled up to show more of those psyco frame parts. When you transform it to Destroy Mode, always take caution when lifting the beam saber connectors. It felt like it can snap so easily if moved with too much force or without support from one of your fingers. Other than that, there are no issues here.
Extras:
There are no actual extra parts here aside from the pieces for arms and this single shield. :/
Shield:

The runners include parts to build the shield but the
manual doesn’t have any instructions how to build it. Well the Unicorn Banshee
wasn’t meant to hold a shield anyway, but I did assemble it thinking it might
look good if it’s attached on the back. I used the manual of my TTH Unicorn to
make sure I don’t miss something.

For some odd reason, I can’t seem to hide the fin-like
psyco frame parts. There’s a portion from these fins that hits the middle part.
As for the other weapons like the Armed Armor VN and BS, I didn't took any pictures for them separately. But I assure you it was a smooth build and there were no snap fitting issues. :)
Decals:

The quality of the dry transfer decals was great. They markings
sticks fast on the surface so you won’t be rubbing too much. In fact, I didn’t
use any adhesive tapes to hold each marking down. I simply placed the cut
marking, and then rubbed it gently.

I have used a few markings or seals and added them on
some parts that looked plain for my taste.
Completed Model:
 |
 |
 |
So here’s the Unicorn Banshee in its Unicorn Mode and I will show the Destroy Mode later.


As you may have seen earlier, the unicorn doesn’t have much good range in terms of movement or both arms and legs. But the good part is that the kit has the range to perform a split.
And now here’s the Unicorn Banshee with the weapons Armed
Armor VN and Armed Armor BS.
 |
 |
 |
I will be delivering the kit in Destroy Mode so
this will be the last time I will transform all the parts. The height was
increased and you see now the clear orange psyco frame parts.


Due to bad lighting, I only have few pictures and I
apologize for that. I also used the camera’s flash but it changed the color
of the parts especially the psyco frame parts. As you can see, the psyco frame
doesn’t look like a clear orange but more of a gold yellow tone same with the
v-fin. :/
So these are my ratings…
 |
| Design was inpsired from GDC cards |
Plastic Quality:
8/10
It seems Daban Model has improved on their plastic
quality and I like the texture and same glossy finish of their kit. If built
and cleaned carefully, the Unicorn Banshee of Daban looks nice. Of course, even
if you sand some the parts, there is still a noticeable darker portion where
the gate was connected. I would like to
add another factor that I was also using an old x-acto blade (half rusty). I
can still the cut the nubs easily. Back then, when I tried to cut them the nubs
little by little, it has a rough feeling and the stress marks appear quickly.
The psyco frame parts weren’t as bright as I expected, so
Bandai still has the lead here. But on the bright side, if you sand them well,
you won’t see any nub marks at all.
Assembly: 8/10
This is the first time I have built a kit from Daban
without any big or major issues. I really had fun building it. Of course, I
mentioned some minor issues but these can be covered quickly by good building
skills.
Detailing: 6/10
I think, just my personal opinion, that Bandai loves the
Banshee too much that the other Unicorn [white] doesn’t have any Psyco Frame
parts as replacement for the gray inner frame ones. I don’t have information if
this was actually seen in ova. Anyways, because of this engineering and
planning of Bandai, the Banshee looks great with more of those clear orange
parts inside.
As for Daban Model’s side, the panel lines weren’t that
deep or visible. The engraved and embossed details on psyco frame parts weren’t
as good as it should be. Maybe I am being strict again, but I wanted Daban to
move higher. If they managed to improve their plastic quality, then getting
crisp or sharp detailing wouldn’t be so hard.
Articulation: 6/10
It can’t be helped if the Unicorn Banshee’s movement is
limited. The design and the transformation gimmick were put into priority
rather than focusing on extreme movements you can do. If you have an action
base/stand, the lack of movement range can be hidden by its simple action
poses. The Unicorn Banshee would look cool on a stand. This is just my personal
view. :)
Gimmicks: 8/10
The transformation for the Unicorn Banshee isn’t hard and troublesome as TTH. I mean, TT Hongli doesn’t have a Banshee, but Daban’s was way better. It was really fun than my TTH Unicorn and TTH FAU. I didn’t have any trouble moving the parts. This was supposed to be a nine but I had received some info from other builders they had trouble with the transformation on the abdomen area. I can overlook this issue but there were more than one case. So yeah, please take note of the abdomen section, because it was mentioned that the clamp gets stress marks easily and tends to become loose.
Weapons: 8/10
Unlike the white Unicorn Gundam, the Banshee boasts in
new weapons. The Armed Armor VN and BS look really cool. Both of these weapons
have their own mini transformation gimmick as well. I’m supposed to give it a 7
because of the beam saber issue. I can’t remember but it seems you can’t flip
the extra beam sabers on the arms forward.
The reason why the rating is still an 8 is because of the
shield. The Unicorn Banshee doesn’t have the shield but you can build one using
a construction manual for the white Unicorn Gundam. Then attach this shield on
its back.
Extras : 6/10
Yeah, the shield was one of the extras here. A lot of
them were the gray parts for the inner frame, and some parts meant for the
white Unicorn. There are two options for the v-fin. You can use the one that
folds back to Unicorn mode, or use the one for the permanent destroy mode. If
there was a base stand/action base, I would raise my rating to 7.
Patience: 5/10
There were no bad issues here that will consume a lot of
your time. Progressive sanding process isn’t that time-consuming either because
most of the parts have small gates thus leads to smaller nubs you need to
clean. It was fun to build and you can finish the kit quickly if you will not
sand the inner frame parts that are not visible.
Overall Rating: 8/10
It’s been a while since I built a bootleg kit that
doesn’t trouble you with lots of issues. The last bootleg I encountered with no
issue was the Xi Gundoom [Gundam] of Model Comprehend brand. I will not
restrict you guys on what brand you should get. Either Bandai or Daban Model is
good. I have no complaints here for Daban Model’s Banshee, but if you still
doubt the quality of this kit then go for Bandai.
The quality of the plastic is good, so using them as
replacement part doesn’t seem to be a problem. I am still disappointed they
[Bandai] only pick certain kits to have a pedestal/action base. If could have
been nice too if Bandai included a gold dry transfer instead of white. Well,
that issue can be treated by purchasing waterslide decals from Bandai or any
3rd-party custom decals from other sellers.
The kit is really nice that this is recommendable for beginners or just starting in the Master Grade line. Those who just want to do a straight-build can pick this kit as well.
So that’s about it for my short review here in Daban
Model’s Unicorn Banshee. I hope this can help you decide if you are planning to
get one, or just not sure whether to start building the kit because of the
hidden issues.
I will be posting another review and this one would be a perfect
grade kit. If my client will ask me to build the PG Unicorn of Dragon Momoko
earlier, then the next article will be the PG Strike Freedom.
It’s possible I will post the PG Unicorn of Dragon Momoko
ahead of schedule. So by the time I post the PG Uni, the last sentence won’t
matter. Lol XD
And do check our Gunpla-related Facebook page - Click
Here
No comments:
Post a Comment