

SKIP IF YOU DON'T WANT TO READ MY NOTE
There are a lot of things I would like to say and these are my
apologies. First is that I am sorry if some of the images are blurry or out of
focus. I am using a half-broken camera and it was just given to me. I don't
have the luxury to buy a new camera because my aim is just to show the kit or
model can do. I received a lot of tips from friends and colleagues how to
improve my shots a little bit even with a broken camera. The results were not
so bad, but I am still looking for other options to improve the lighting conditions
in my room. So yeah, I apologize for my bad pictures.
My second apology would be the very late update here in my blog. I
was crammed with new kits, extra work, and a lot of personal problems I have to
solve. The kit I am working now (Oct 2016) is a Perfect Grade which I will post
after a few more articles (I've already finished the watermarks). I am glad a
lot of you are still taking a peek on my blog even though there are lots of
other cool reviewers than me. If I have the funds to take the kit, I will
review them. And now that I have finished my work, I have time to update my
blog and post all of my other reviews. The bad news however is that I don't
have any funds now to get new kits to review. I am still hoping for my friend
which happens to be my client, to continue hiring me as his builder.
And my last apology would be the often changes in my blog. If you
have noticed, it's not that fixed yet and the domain shows a lot of redundant
stuff. Some of the tabs are not finished and will just redirect you to the main
page again. But I have fixed it again by using a default template and just
tweaked the fonts, color, etc.
Introduction:
After receiving the request of building the PG Strike Gundam (Daban Model), my client already stated that he will try to find the PG 1/60 Skygrasper+ Aile. Well it was just a matter of time and I thought the kit is hard to find. So after building the Char’s Zaku II, he gave me a holler that the kit will be handed to me. I was glad that his trust was still there after all the errors I’ve done on the past kits he brought.
Anyways, I know there are lots of other reviews out there
for this kit, but I just want to create mine. Creating short reviews about
gunpla kits is sort of a hobby now and it really relieves my stress. :))
Okay, reminder that I am NOT a professional builder. I don’t even put that thought in my head each time finish a project. Feel free to send some tips if you know any.
Okay, reminder that I am NOT a professional builder. I don’t even put that thought in my head each time finish a project. Feel free to send some tips if you know any.
I would like to apologize that there will be visible nub
marks on the featured kit. If there are any errors (spelling, grammar), please
do mention them on the comments section. If there are also any errors on the
terminologies used, please do correct me.
Please be advised that some of the pieces on each “parts
exploded view” might be missing. I sometimes forget that they are still on the
runners. But usually, I don’t notice them quickly in the construction manual.
Unboxing:
 |
 |
 |
The Skygrasper+Aile looks more like a model kit of the
Skygrasper and the Aile pack was just an add-on in case you have the Strike
Gundam. This is just my opinion regarding my first impression after looking at
images on the box.
The manual is glossy and shows various feats regarding
the model kit. There were only 13 runners inside and I’ve included the big base
stand on the count. There’s a sheet of clear stickers which I doubt to be near
good quality.
Regarding the plastic, I saw that there are black specks
in it. Yes, “in it” and not “on it”. It seems Daban Model used recycled plastic
materials for the white parts which is a big eyesore for my side. :/
 |
 |
 |
I only saw images through the internet and the box’s front view is shown, so I thought it was big. After seeing it close and counting the runners, my expectation for the term “Perfect” was kind of a letdown. Or maybe I was just expecting too much again since I had my review on Dragon Momoko’s Skygrasper+Aile.
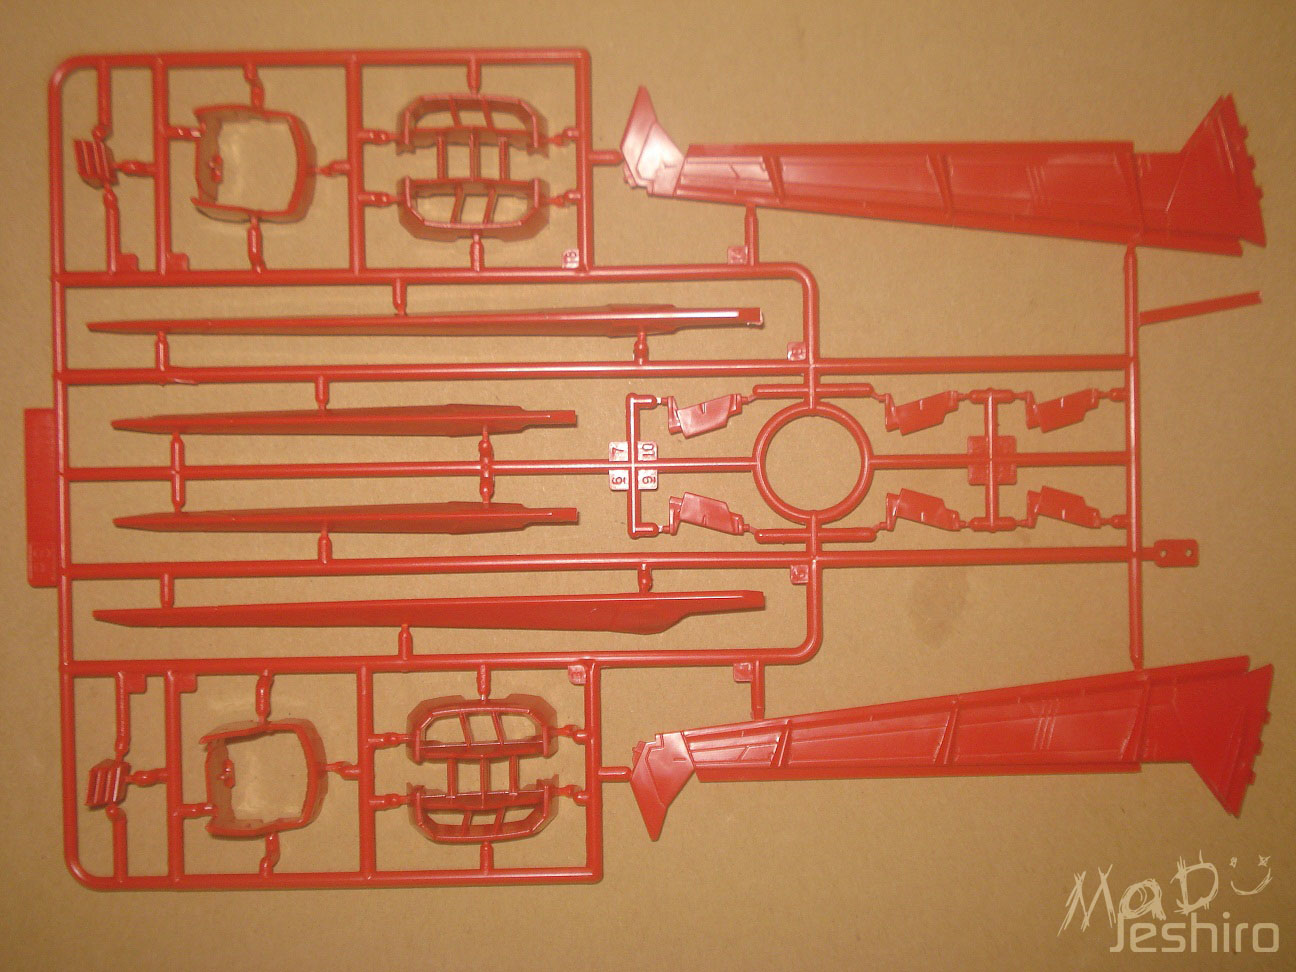
The next images will be the runners and the other
contents of the kit.
Runners:
|
|
|


|
|
|


|
|
|


|
|
|


|
|


Before I start building, I would like to mention that the parts are big and putting all the pieces on the table to build the whole Skygrasper would be risky. Not to mention that it might consume a lot of time. I checked the construction manual regarding the Skygrasper and I saw that the model is divided into specific sections or parts. So I think I will do just that to avoid errors or misplacing any parts.
Cockpit:
In this section, you will build the cockpit and the nose of the Skygrasper. There were no snap fitting issues here, which is a good start for me.
I also tried experimenting by adding color on the cockpit’s control panel. They were big enough so the idea bumped into me and I used my uniball signo pens to color it up.
You can lift the cockpit hatch up and see the pilots inside.
 |
| The cockpit |
In this section, you will build the cockpit and the nose of the Skygrasper. There were no snap fitting issues here, which is a good start for me.
 |
| Adding some color inside the cockpit |
 |
 |
 |
You can lift the cockpit hatch up and see the pilots inside.

Body (Air Intake + Thruster Nozzles):

Nice parts separation here and credits goes to Bandai. But, there were some issues in this section. The part of the wings where you will attach the weapon bays? They were very, very tight and I had to trim the female pegs to fit them.

Nice parts separation here and credits goes to Bandai. But, there were some issues in this section. The part of the wings where you will attach the weapon bays? They were very, very tight and I had to trim the female pegs to fit them.
Yes I mentioned pegs, no hinges or any mechanism that will allow these “wings”
to be moved forward or backward. Dragon Momoko’s Skygrasper can do that so I
was a bit disappointed that the Perfect Grade Skygrasper isn’t that perfect at
some point.
 |  |  |
The nozzle (blackish part) of the back thrusters is a bit
loose. I didn’t apply any glue though. I added some minor coloring here using
metallic red and silver.
Weapon Bay/Side Thrusters:

I will check Bandai’s construction manual again to correct me on this part. I don’t have the manual anymore and I forgot to write down the sections. But as I recall, I think this was called weapon bays. They kind of looks like side thrusters to me. I will use those words to describe these parts.

I will check Bandai’s construction manual again to correct me on this part. I don’t have the manual anymore and I forgot to write down the sections. But as I recall, I think this was called weapon bays. They kind of looks like side thrusters to me. I will use those words to describe these parts.


Anyways, there were snap fitting issues here. You can
pull half of the body to reveal the “hardpoints” (please correct me about this
word). Well, you will get some parts to attach the Shield and Beam Rifle on the
Skygrasper’s side.


There’s also a female peg under that will be used if you
want to attach the landing gears.
Beam Cannon:


Very straightforward and no snap fitting issues here. :)


I will add some minor coloring on this part.
Extras:
Landing Gear:

I forgot the landing gears and I will just consider them as extras. You can also remove these landing gears and attach the armor platings to cover the female pegs under them.
Landing Gear:

I forgot the landing gears and I will just consider them as extras. You can also remove these landing gears and attach the armor platings to cover the female pegs under them.
You will also notice that the wheels for the landing
gears have a flat side. This means you won’t be able to spin them – the whole
thing is fixed. :P
Base Stand:

The usual base stand for most gunpla PG kits – no other features here aside from the 2 pegs that you can use how you want to pose Skygrasper. There were lots of dimples on the stand and the gates were really big. The clamp-like mechanism at the bottom of stand allows you to move it forward, giving you a slanted position for Skygrasper or Strike.


The usual base stand for most gunpla PG kits – no other features here aside from the 2 pegs that you can use how you want to pose Skygrasper. There were lots of dimples on the stand and the gates were really big. The clamp-like mechanism at the bottom of stand allows you to move it forward, giving you a slanted position for Skygrasper or Strike.

There are 2 female pegs on the sides and manual shows you
that you can attach the weapons here I think. :v
Half Completed Model:
This is the first time I also used a pen called Marvy Uchida. The tip is 0.03 so the lines drawn are very thin. But mind you that it’s also very fragile. Do not force the tip of the pen if the panel lines are way more narrow than 0.03.
 |
 |
 |
This is the first time I also used a pen called Marvy Uchida. The tip is 0.03 so the lines drawn are very thin. But mind you that it’s also very fragile. Do not force the tip of the pen if the panel lines are way more narrow than 0.03.
Aile Striker Wings:


And that’s about all the parts for the Wings. Yes, this
is just the wings and not the whole Aile Striker pack yet. The Aile Striker pack is divided
into 3 major parts. And the nice thing about it, is that you can easily
disassemble these 3 parts.


Well, not too many parts here, but the detailing is good. There were several tight sections here, but they were not much of a big issue if you can sand the male pegs first before attaching the parts.


Well, not too many parts here, but the detailing is good. There were several tight sections here, but they were not much of a big issue if you can sand the male pegs first before attaching the parts.
Aile Striker Booster:

I can’t remember if these were called thrusters but it kind of looks like one. :v
Some tight parts as you assemble the thruster’s engine. I had some trouble attaching the yellow parts and one of them got a small stress mark.

I can’t remember if these were called thrusters but it kind of looks like one. :v
 |
 |
 |
Some tight parts as you assemble the thruster’s engine. I had some trouble attaching the yellow parts and one of them got a small stress mark.
Those fins can be removed easily too because it’s attached
on a PC part.
Aile Striker Battery Pack:


So here’s the “battery” of the aile pack which is
attached under the wing unit. Sorry I forgot to clean the nubs on the beam
saber’s tip. :v
I also included the parts that will serve as a rack for the beam rifle and shield.
 |
 |
 |
I also included the parts that will serve as a rack for the beam rifle and shield.
No snap fitting issues on this section. :)
Completed Aile Striker Pack:
So here’s the AIle pack unit after connecting all the 3 major parts. I attached the thrusters on the opposite side. I'm going to fix it in the Completed Model segment. -_-
The longer fin is supposed to be on the bottom and not the other way around.
 |
 |
 |
So here’s the AIle pack unit after connecting all the 3 major parts. I attached the thrusters on the opposite side. I'm going to fix it in the Completed Model segment. -_-
The longer fin is supposed to be on the bottom and not the other way around.
Anyways, not much of a big deal as I or my client can
remove/attach them easily. You can also pull the wings outward and bend it
down.
Compared to Dragon Momoko’s Aile pack, this one doesn’t
have any features where you can use some hardpoints. What? Is it wrong to
expect that this Aile pack was designed to form the Perfect Strike? And because
there wasn’t any, I guess it wasn’t meant to form the PG Perfect Strike. :/
And here’s the Aile after attaching it on the back or
rear end of the Skygrasper. It fits nicely and doesn’t wobble or shake. When
you look at it, the Aile now really serve as Skygrasper’s main wings.
 |
 |
 |
Comparison:
I thought of comparing the 1/100 one from Dragon Momoko. Not you have a size reference. I’m sorry I don’t have the size comparison for the Aile pack because it’s kind of tiring to attach/remove the launcher’s mechanical arm again.
 |
 |
 |
 |
 |
I thought of comparing the 1/100 one from Dragon Momoko. Not you have a size reference. I’m sorry I don’t have the size comparison for the Aile pack because it’s kind of tiring to attach/remove the launcher’s mechanical arm again.
Aile Strike Gundam:
 |
 |
 |
And here’s the Aile pack attached on the back of Strike
Gundam. The wings can be bent down as you can see on the image.
 |
 |
 |
Sorry for the blurry shots. It seems the upper part of
the camera’s lens has a problem. Mind you that this camera isn’t mine. :v
Completed Model:
 |
 |
 |
|  |  |
So it’s time for my personal rating regarding this kit.
 |
I edited this image and it was based from the back design of the cards of
GDC (Gundam Duel Company)
|
Plastic Quality: 6/10
No, I do not like the plastic quality. I’m not even sure
if it was an isolated case where the white parts have black specks in it. The
texture when you cut the nubs is a bit rough as if you were trying to scrape a
rock. I’m actually using a new X-Acto blade during that time and I was really surprised
that the quality isn’t much like Daban at all. It was a shame I had to go
through that and I was expecting a better quality. The plastic is glossy
though, but it wasn’t much to cover the issue. :/
Assembly: 7/10
Well most of the parts have tight sections and snap fitting were a pain – literally. But that doesn’t mean that all of them were bad. I think 7 is just fine. I had fun building it because most of the parts were already molded (less parts separation), easy to build so to say.
Assembly: 7/10
Well most of the parts have tight sections and snap fitting were a pain – literally. But that doesn’t mean that all of them were bad. I think 7 is just fine. I had fun building it because most of the parts were already molded (less parts separation), easy to build so to say.
Detailing: 7/10
The detailing here is just as great as the RG version.
There are lots of lines here and there to work on. Of course, RG is outstanding
in its own line and the PG Skygrasper did pulled its way up. There are still
some parts on the RG Skygrasper where the PG version doesn’t have. I mean, it’s
called a Perfect Grade so it should have a better detailing or at least shares the
quality of detailing RG is known of. Anyways, I’m giving it a good rating
because this one deserved it.
As for the detailing made by Daban Model in terms of
copying it from the original, it wasn’t as bad as it seems. Surely, they are
not as crisp as Bandai but it’s far better than the molding of TT Hongli kits.
Articulation: 5/10
Like I said earlier, I was expecting that the wings connecting to the weapon bay’s have some kind of mechanism to be moved backward, same with Dragon Momoko’s gimmick. It was kind of disappointing that the Skygrasper acted out so plain. I mean Bandai should’ve prepared some nice gimmicks into it; after all it’s a Perfect Grade. Bandai may have some reasons and probably focused on the Aile Pack.
Like I said earlier, I was expecting that the wings connecting to the weapon bay’s have some kind of mechanism to be moved backward, same with Dragon Momoko’s gimmick. It was kind of disappointing that the Skygrasper acted out so plain. I mean Bandai should’ve prepared some nice gimmicks into it; after all it’s a Perfect Grade. Bandai may have some reasons and probably focused on the Aile Pack.
Gimmicks: 6/10
There weren’t much to show here and most of the parts are fixed. It could have been nice if there were more tricks to the skygrasper specially knowing it belongs to the Perfect Grade line. I’m giving it at least a 6 because of the movable parts where you can attach the rifle and shield pegs. I know these are old features from the model itself but they are still unique for me in some way.
Extras: 4/10
I’m not trying to be strict here but I think that the reason why Skygrasper+Aile doesn’t have “extras” is that the whole kit is THE Extra itself meant for the PG Strike Gundam. Of course, even if this fact was true, Bandai should have pulled something fancy out of their sleeves. At least you get the action Base that you can use to put the Aile Strike Gundam in action pose.
Overall Rating: 7/10
I know there was a Real Grade version and my impressions here
in the Perfect Grade Skygrasper could be all wrong. If any of you have info
about the RG, do comment below.
Anyways, it was a quick build but I would recommend being patient when you clean the nubs. Like I always do, I keep on rushing on things and that’s where the time I get errors, visible nub marks, etc.
Anyways, it was a quick build but I would recommend being patient when you clean the nubs. Like I always do, I keep on rushing on things and that’s where the time I get errors, visible nub marks, etc.
Again this is just my personal statement, but it seems
that Bandai may have designed this purely as an add-on (of course, it’s
released as a solo model of the Skygrasper itself). They might have focused on
making it just for Strike Gundam and giving Skygrasper with some nice PG-level feats
isn’t part of the plan. I could be wrong though. :/
There were lots of possible improvements Bandai may have implemented on Skygrasper and the Aile pack.
Maybe it’s just me being too hooked on Dragon Momoko’s detailing and other neat gimmicks. Then again, the fact that the kit has lots of gaps for improvement should have been reconsidered or seen by Bandai. Unless, they already knew this coming right from the start and probably have planned to release a better one someday. Of course it takes a longer time for them to be released specially in the PG line. Not to mention that there might be some type of popularity voting amongst consumers what PG model should be released next.
Please do correct me about my speculations and/or deductions. I did saw in the construction manual that there’s an image of launcher and sword packs. I think it was just part of the explanation how many packs can be used on the Strike Gundam. lol :v
Okay, if you want to go for Bandai, then do so. I don’t have any info about the Bandai’s quality though. And you also have the option of getting Bandai’s Strike Rouge and just paint the model.
This goes for Daban Model as well because they already have a Strike Rouge. It’s your decision now if you want to go all through those challenges using a cheaper path. Or avoid some of the bad qualities by going through the expensive yet legit path. :)
Also, have a look on our Gunpla-related Facebook page - Click Here
Note: It was funny I kept pronouncing the word Rouge as *rowg*. Mind you guys for those who gets confused that the Rouge is pronounced as *rooj* with a lighter ending. Thanks for some friends for correcting me on this word.
Creme brule graisse ventre femme
ReplyDeleteBruleur de graisse puissant et rapide
Avis sur bruleur de graisse efficace
Bruleur de graisse naturel et efficace
creme brule graisse
Bruleur de graisse femme musculation
Complement brule graisse sport
Bruleur de graisse naturel musculation
Compl%C3%A9ment alimentaire graisse abdominale